
The Brooklyn Bridge appears simple from a distance: two granite towers, four great cables and a skyline behind them. On a map, however, the photograph immediately becomes more complicated. The bridge is nearly impossible to reduce to one “best” viewpoint because every side tells a different story.
From the elevated promenade, it is an exercise in symmetry and human movement. From Brooklyn Bridge Park, it becomes part of the Lower Manhattan skyline. From directly below, its stonework feels less like an icon and more like infrastructure. And from the Manhattan Bridge, the Brooklyn Bridge finally sits apart from the city around it.
I wrote the original version of this guide while researching locations for a future New York trip. That detail matters. It means the first article was a collection of ideas, not a report from a completed shoot. In this rewrite, I have kept that distinction clear. I am not going to pretend I stood in places I had only studied on a screen.
What I can do is approach the subject as a photographer: separate the two bridges that are so often confused, verify the public access points, study the direction of light, remove unsafe suggestions and turn a loose list of pins into a route that can actually be followed.
The short answer: where is the best place to photograph the Brooklyn Bridge?
If I had only one evening, I would go to Empire Fulton Ferry and Fulton Ferry Landing on the Brooklyn waterfront. They offer a clean view of the Brooklyn Bridge, the East River and Lower Manhattan, and they remain useful from late afternoon through blue hour.
For the classic symmetrical photograph between the cables, I would use the Brooklyn Bridge pedestrian promenade at sunrise. For a wider, elevated view of the entire bridge, I would use the south pedestrian walkway of the Manhattan Bridge. For stone arches and structural details, I would work around Emily Warren Roebling Plaza, directly beneath the bridge in Brooklyn Bridge Park.
| Photo spot | What it gives me | Best light | Useful lens | Main limitation |
|---|---|---|---|---|
| Brooklyn Bridge promenade | Towers, cables, symmetry and people | Sunrise or early morning | 24–70mm; 70–200mm for details | Very crowded later in the day |
| Brooklyn approach | Reverse view toward Manhattan and compressed cables | Early morning | 70–200mm | Less immediately recognizable |
| Emily Warren Roebling Plaza | Underside, stonework and scale | Overcast light or late afternoon | 16–35mm | Strong perspective distortion with very wide lenses |
| Empire Fulton Ferry | Bridge, skyline and river in one frame | Sunset, blue hour and night | 24–70mm | Popular at sunset |
| Jane’s Carousel | Layered frame with glass pavilion and bridge | Blue hour | 35–85mm | Reflections and visitors can complicate the frame |
| Fulton Ferry Landing | Open water-level view | Sunset through night | 24–70mm; 70–200mm | Moving ferries and wind |
| Pier 1 / Granite Prospect | Wider skyline and environmental view | Golden hour and blue hour | 24–70mm | Bridge is smaller in the composition |
| Pebble Beach / Main Street | Both bridges, shoreline texture and skyline | Sunset | 24–70mm | Manhattan Bridge is usually more dominant |
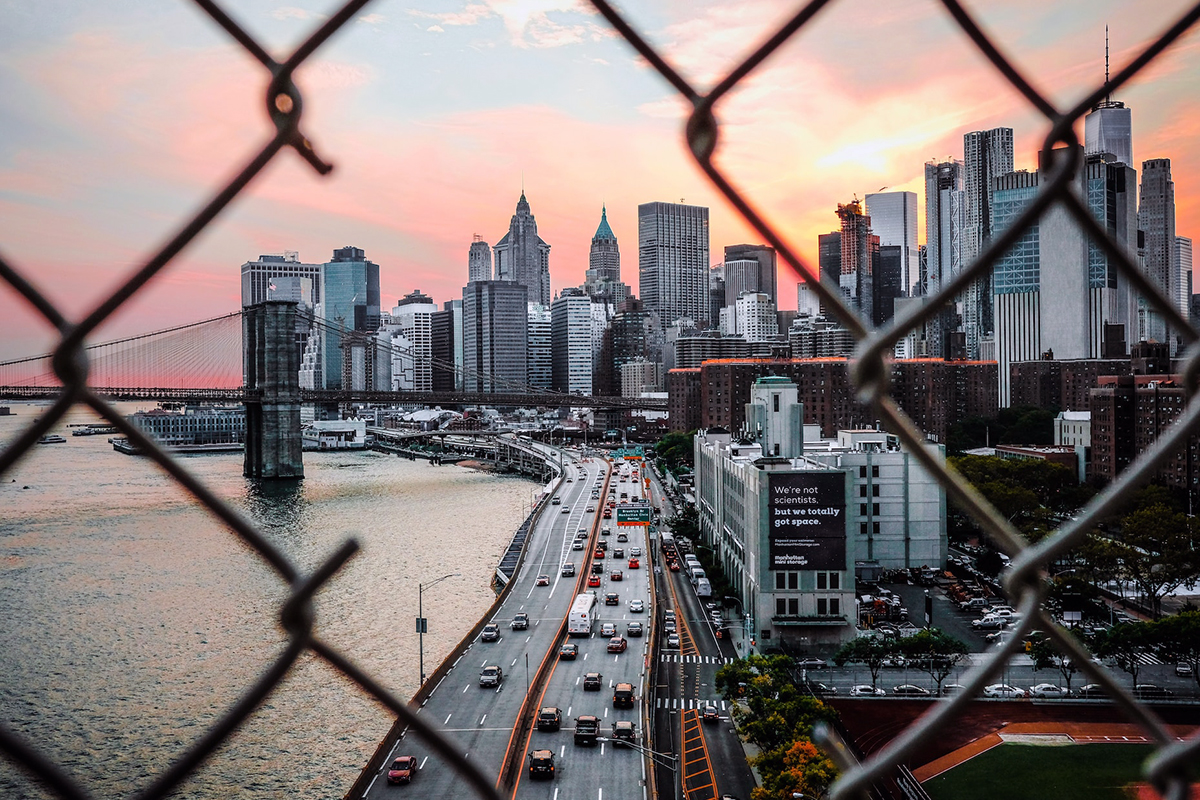
| Manhattan Bridge walkway | Elevated Brooklyn Bridge and Lower Manhattan view | Late afternoon or dusk | 24–70mm; 70–200mm | Fence, train vibration and loud traffic |
| Brooklyn Heights Promenade | Broad harbor context | Sunset and twilight | 70–200mm | More distant view |
| NYC Ferry | Changing river-level perspective | Late afternoon | 24–70mm with fast shutter | No time to refine a composition |
First, do not confuse the Brooklyn Bridge with the Manhattan Bridge
This is the most important correction to my original article.
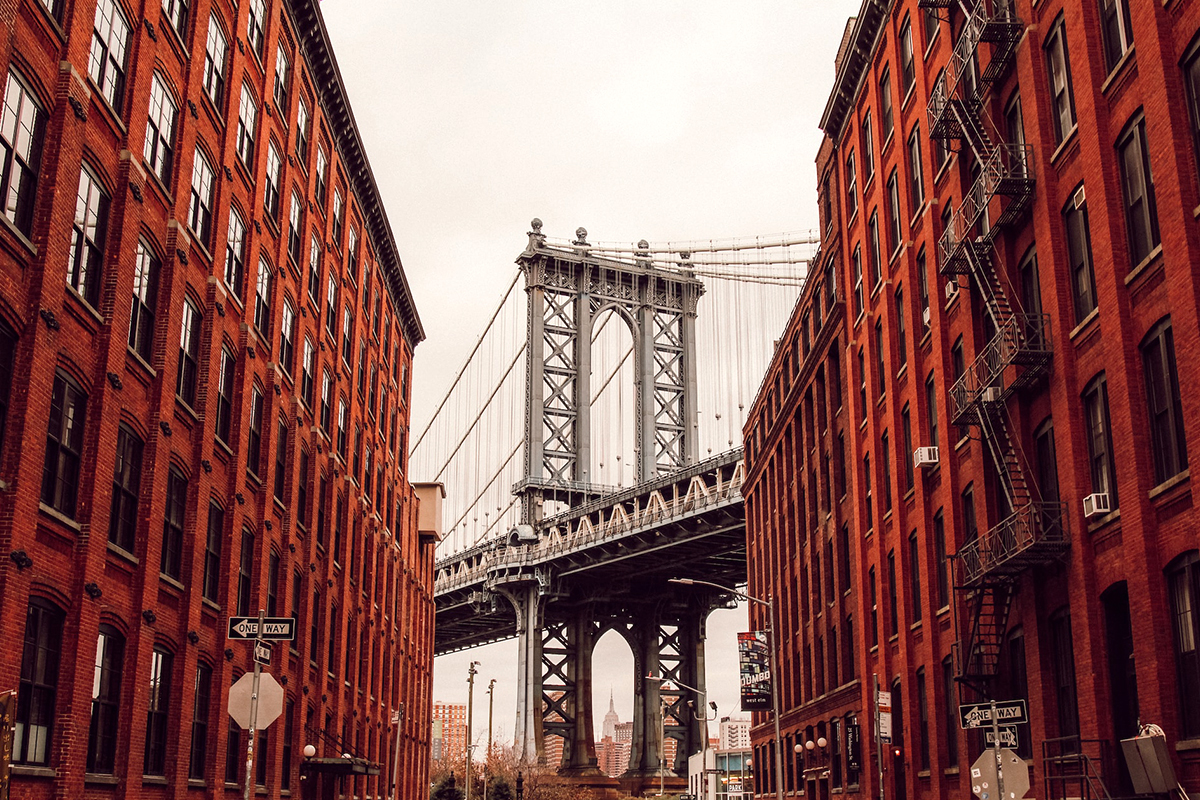
The famous DUMBO view from Washington Street, with a steel tower framed tightly between red-brick warehouses, is the Manhattan Bridge. It is not the Brooklyn Bridge. The Empire State Building can appear beneath the bridge in the distance when the alignment and lens are right, which has made the location one of New York’s most reproduced street photographs.
The difference is easy to recognize once I stop looking only at the skyline:
| Brooklyn Bridge | Manhattan Bridge |
|---|---|
| Granite neo-Gothic towers with pointed arches | Blue-gray steel towers with an industrial lattice structure |
| Open web of diagonal stays and vertical suspender cables | Heavier steel trusses and subway tracks |
| Opened in 1883 | Opened in 1909 |
| Elevated timber pedestrian promenade runs through the center | Pedestrian path runs along the south side |
| Best known DUMBO views are around Empire Fulton Ferry and Fulton Ferry Landing | Classic street frame is on Washington Street |
Washington Street is still worth photographing as a companion location. I would simply label the image correctly. A guide that promises Brooklyn Bridge photo spots should not use a Manhattan Bridge photograph as its hero image and hope nobody notices.
A practical Brooklyn Bridge photo route
The most efficient route begins in Manhattan, crosses the Brooklyn Bridge on foot and continues through the waterfront sections of DUMBO. It avoids backtracking and gradually changes the subject from geometry to cityscape.
I would allow three to four hours for the full route. That includes slow walking, waiting for clear frames and remaining in place through sunset or blue hour. A brisk visitor can cover it faster; a careful photographer rarely should.
| Stage | Location | Approximate shooting time | What I would make there |
|---|---|---|---|
| 1 | Manhattan entrance at Centre Street | 10–15 min | Approach, civic buildings, first tower in the distance |
| 2 | Brooklyn Bridge pedestrian promenade | 45–75 min | Symmetry, cables, towers, pedestrians, telephoto details |
| 3 | Brooklyn pedestrian exit | 10–15 min | Reverse view toward Manhattan and bridge approach |
| 4 | Emily Warren Roebling Plaza | 20–30 min | Underside, arches, textures and human scale |
| 5 | Empire Fulton Ferry and Jane’s Carousel | 30–45 min | Side profile, carousel layers and skyline |
| 6 | Fulton Ferry Landing | 20–40 min | Water-level bridge view and long exposures |
| 7 | Pier 1 or Pebble Beach | 30–60 min | Wider sunset and blue-hour compositions |
Where to enter the Brooklyn Bridge
On the Manhattan side, the promenade begins near Centre Street and City Hall Park, close to the Brooklyn Bridge–City Hall subway station. On the Brooklyn side, the long approach continues toward Adams Street; there is also pedestrian access around Washington Street and Prospect Street, at the northeast corner of Cadman Plaza.
The Brooklyn Bridge Park directions page confirms both Brooklyn access points. NYC redesigned the Manhattan-side bicycle and pedestrian connections in 2026, so I would follow the current signs rather than an old blog diagram or a screenshot saved months earlier.
The bridge is free to cross and the pedestrian promenade is open at all times. Ongoing masonry work can occasionally narrow sections of the walkway, although NYC DOT says the promenade remains open.
1. The Brooklyn Bridge pedestrian promenade
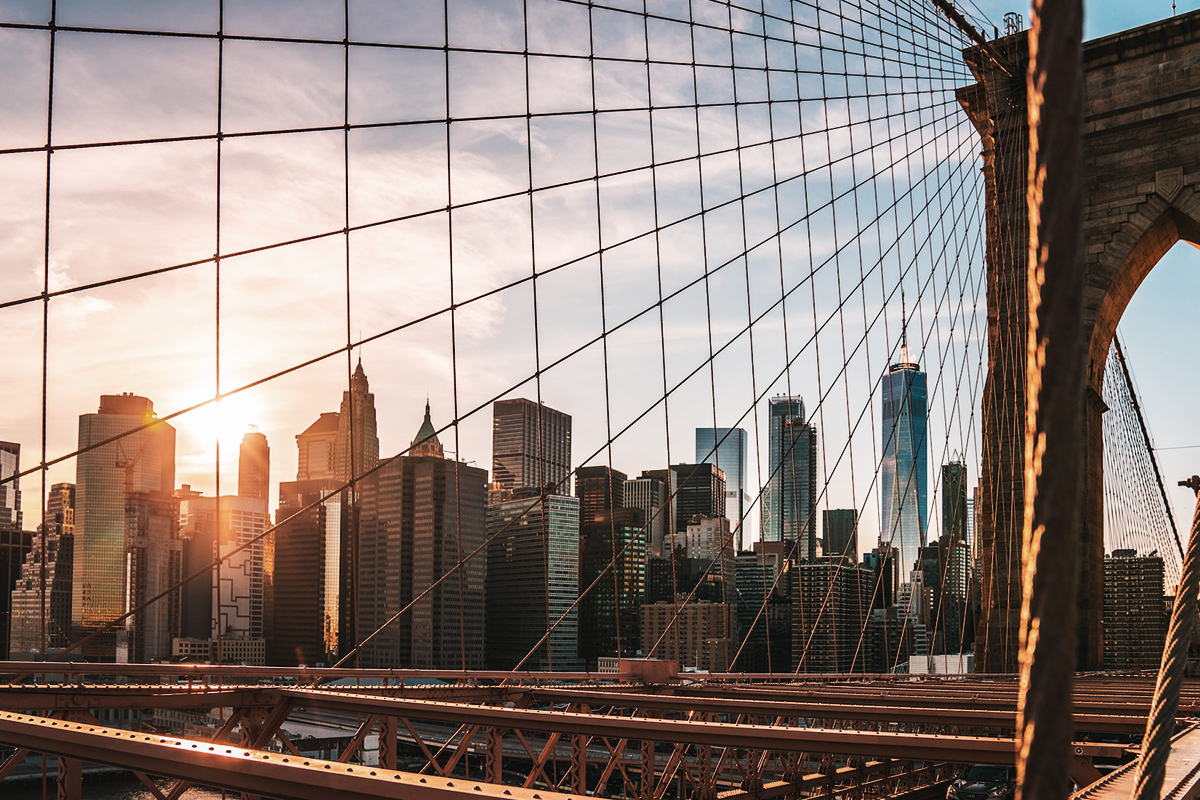
The promenade is the place for the photograph most people already have in mind: the tower centered in the frame, cables spreading toward the corners and the timber walkway acting as a leading line.
It is also the location where composition and public courtesy collide. The deck narrows around structural elements, people stop abruptly, and the central alignment attracts almost every camera. A perfect empty frame at noon is not a realistic expectation.
Since September 2021, cyclists have used a protected two-way lane on the roadway below. The elevated promenade is now pedestrian-only. That is a major improvement over older guides—including my first version—that warn photographers to stay out of a painted bicycle lane on the timber deck. The warning is outdated, but the basic principle remains: I should not block a working transportation route to make a photograph.
The classic tower composition
For a clean architectural frame, I would begin with a standard zoom rather than an ultra-wide lens. Around 35–50mm on a full-frame camera, the nearest tower keeps its weight without the corners stretching unnaturally. I would place the central seam of the walkway directly beneath the arch and check that the two main cables leave the upper corners with similar tension.
The photograph becomes more convincing when there is a person in the lower third. A lone pedestrian gives the stone tower a sense of scale. A crowd tells a different story: the bridge as a public street in the sky. I would not automatically remove every person in editing; sometimes the human traffic is the point.
Starting settings: 1/250 sec, f/5.6 to f/8, Auto ISO, continuous autofocus. If the sky is bright, I would expose for the highlights and lift the darker timber and cables later from a RAW file.
Use a telephoto lens for order, not just reach
At 70–200mm, the bridge changes. The cables compress into layers, tower openings sit closer together and distant Manhattan buildings can be isolated between the stonework. This is often a calmer photograph than the usual ultra-wide frame because it removes signs, fencing and the busiest edges of the promenade.
I would look for:
- repeated vertical suspenders;
- the American flag above a tower;
- pedestrians silhouetted inside an arch;
- the Empire State Building or Lower Manhattan buildings framed by cables;
- details where granite, steel and timber meet.
Why sunrise is worth the early alarm
Sunrise is less about putting the sun directly behind the bridge and more about access to a quieter structure. The direction of the warm light changes through the year, but the practical advantage remains: fewer visitors, softer contrast and cleaner air than at the busiest afternoon hours.
I would arrive before sunrise, make the precise symmetrical frames while the walkway is relatively calm, then loosen the composition as commuters and runners begin to enter it. The sequence tells a better story than one empty postcard.
2. The Brooklyn approach and the reverse view toward Manhattan
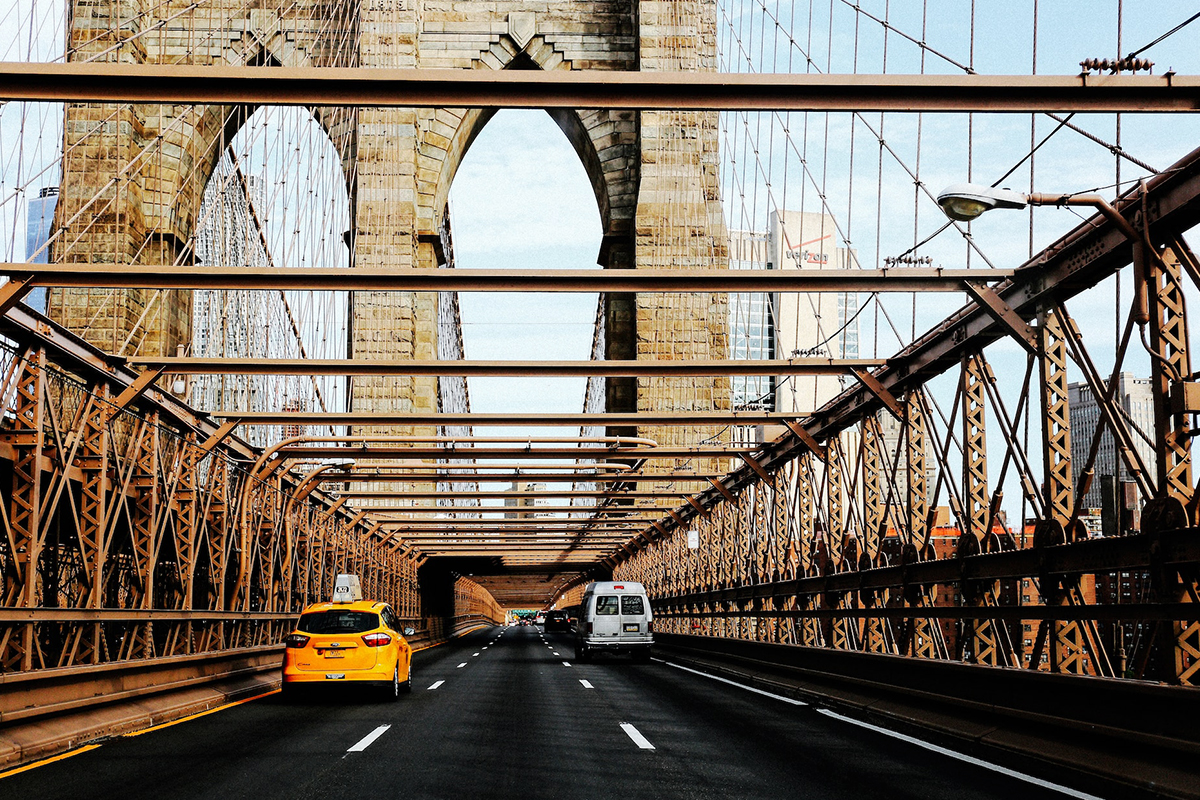
Many photographers finish with the first stone tower. I would keep walking.
The Brooklyn half of the promenade offers more distance from Lower Manhattan. Turning around here can compress the skyline behind the cables, especially with a telephoto lens. The viewpoint is less iconic but often more layered: timber underfoot, stonework around the frame and the Financial District beyond.
The curve and slope of the approach also create useful moments where walkers separate from the background. I would use 85–135mm, wait for one subject to enter a clean area and keep the shutter around 1/500 sec if the person is moving quickly.
This is not a place for a tripod at a busy hour. The deck can be narrow, and even a small setup creates an obstacle. Image stabilization, a high ISO and careful bracing are more responsible choices.
3. Emily Warren Roebling Plaza: the bridge from below
Opened in 2021, Emily Warren Roebling Plaza filled the former gap beneath the Brooklyn Bridge and connected the DUMBO section of Brooklyn Bridge Park with the piers to the south. It is one of the most useful additions missing from older location lists.
The plaza is named for Emily Warren Roebling, whose role in completing the bridge is now inseparable from its history. For a photographer, the location also changes the bridge’s scale. Instead of viewing the towers as a distant emblem, I can study the underside, the granite base, the roadway structure and the people passing beneath it.
What works here
An ultra-wide lens between 16mm and 24mm can include the mass of the structure, but I would use it carefully. If I tilt the camera sharply upward, the vertical lines race inward and the tower appears to collapse. Sometimes that distortion is expressive; sometimes it is only an accident.
I would try three approaches:
- Keep the camera level and let the bridge enter from the top of the frame.
- Use a person, bench or bollard to establish scale.
- Switch to 50–85mm and isolate texture: weathered stone, rivets, repeating beams and the boundary between shadow and open sky.
Overcast weather is useful here because it holds detail in both stone and steel. In hard midday light, I would expose for the bright edges and let the deeper underside remain dark. The contrast can make the structure feel heavier.
4. Empire Fulton Ferry: the strongest all-round view
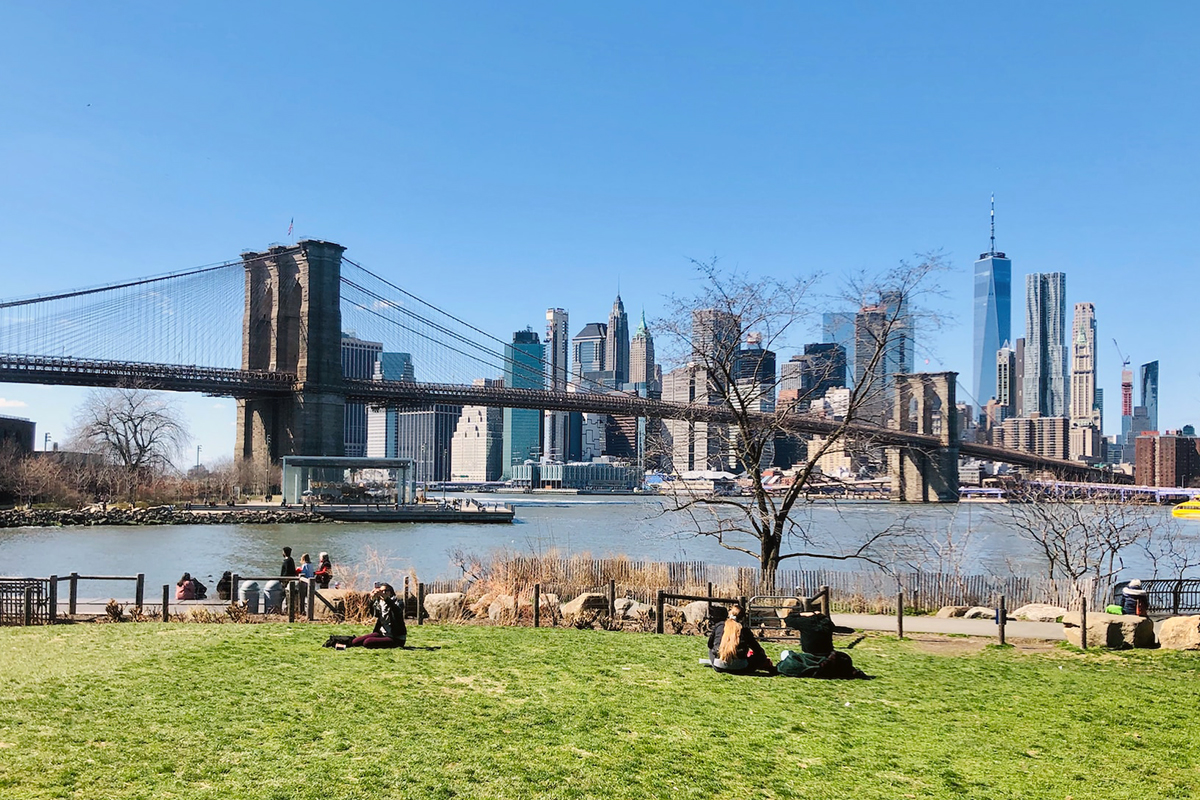
If I had to recommend one area rather than one exact paving stone, it would be Empire Fulton Ferry. The lawn, boardwalk and paths sit between the Brooklyn and Manhattan bridges, with Lower Manhattan across the East River.
This is where the Brooklyn Bridge begins to function as part of a cityscape. I can move laterally, alter the amount of water in the foreground and decide whether the tower, skyline or people on the waterfront should dominate.
The official Empire Fulton Ferry page specifically notes its nighttime views of the Brooklyn Bridge and Manhattan skyline. It is not a secret location, but it is a productive one because the scene keeps changing after the sun disappears.
Sunset, blue hour and night are three different photographs
At sunset, the sky and skyline usually demand most of the exposure. I would bracket three frames one stop apart if the contrast exceeds what my sensor can hold, but I would avoid aggressive HDR processing. Halos around the bridge cables make a photograph look artificial very quickly.
During blue hour, the sky retains color while the bridge and office lights begin to separate. This is often the best balance. Ten or fifteen minutes later, the image becomes a night photograph: deeper blacks, stronger points of light and fewer details in the river.
A practical long-exposure starting point: ISO 100, f/8 and 2–8 seconds. I would adjust the shutter for the brightness of the sky, the movement of the water and passing ferries. Wind can vibrate a light tripod, so hanging a bag loosely from the center column is not always helpful; it can become a sail. Keeping the tripod low and using a remote release or two-second timer is safer.
5. Jane’s Carousel: a frame inside the frame
Jane’s Carousel sits in a glass pavilion beneath the Brooklyn Bridge. The restored 1922 carousel introduces color, motion and a human-scale foreground into an otherwise stone-and-steel subject.
The obvious frame is a wide photograph of the pavilion with the bridge behind it. I would also look through the glass, using reflections intentionally rather than fighting all of them. At blue hour, the warm interior light can contrast with a cooler sky.
A circular polarizing filter can reduce glare on the glass, but it is not automatically the right choice. It can also remove the reflection that makes the frame interesting, darken the exposure and affect different parts of an ultra-wide sky unevenly. I would rotate it slowly and decide which surface information I actually want to keep.
If the carousel is operating, a slower shutter around 1/10 to 1/2 second can turn the horses and lights into motion while the pavilion remains sharp. A tripod may trigger different rules depending on the type of shoot, so I would verify permission and never place legs across a path.
6. Fulton Ferry Landing: an open view at water level
Fulton Ferry Landing projects into the East River near the end of Old Fulton Street. It provides a more open line of sight than the lawn and lets the bridge run diagonally across the frame.
This is a strong place to work with moving boats. A fast shutter freezes the ferry against the bridge; a long exposure turns its lights into a bright line. Neither approach is inherently better. The important decision is whether the ferry is the subject or visual noise.
I would keep the horizon level, watch the bright signs and lamps near the landing, and make several variations with different amounts of water. With a 70–200mm lens, individual parts of the bridge can be aligned against Manhattan buildings without including the entire span.
The DUMBO/Fulton Ferry landing also makes this viewpoint easy to reach from Wall Street/Pier 11 or the East River route. Current routes and times change, so I would check NYC Ferry’s live schedule on the day rather than copying a timetable into a travel plan.
7. Pier 1 and Granite Prospect: give the bridge room to breathe
Pier 1 sits south of the bridge and offers a wider environmental view. The Brooklyn Bridge is smaller here, but the photograph gains more river, shoreline planting and Lower Manhattan.
That trade is useful. A location guide should not assume the bridge must fill every frame. From Pier 1, it can become an anchor within a broader waterfront scene.
I would use:
- 24–35mm for the bridge, skyline and river;
- 50–85mm to simplify the skyline;
- 135–200mm to layer the bridge against buildings;
- a low viewpoint near the edge of a path to include grasses or stone in the foreground, without stepping into planted areas.
Granite Prospect offers steps and open sightlines. It is also a public gathering space, so a camera bag and tripod should not occupy more room than necessary.
8. Pebble Beach and Main Street: a wider two-bridge story
Pebble Beach, in the Main Street section of Brooklyn Bridge Park, is better known for the Manhattan Bridge. That is exactly why it can be useful in a more complete essay.
From this part of the shoreline, the Manhattan Bridge tends to dominate while the Brooklyn Bridge and Lower Manhattan sit farther away. I would not call it the cleanest Brooklyn Bridge portrait. I would call it a place to show the two structures in relationship: nineteenth-century granite suspension bridge, twentieth-century steel bridge, twenty-first-century skyline.
The stones at the water’s edge create foreground texture, but they can be uneven and slippery. I would stay within public areas, keep clear of the tide line when conditions are rough and never move stones or vegetation to manufacture a composition.
The Main Street section is also only a short walk from Washington Street, so this is the logical point to make the famous Manhattan Bridge warehouse frame—properly captioned as the Manhattan Bridge.
9. The Manhattan Bridge pedestrian walkway: the elevated overview
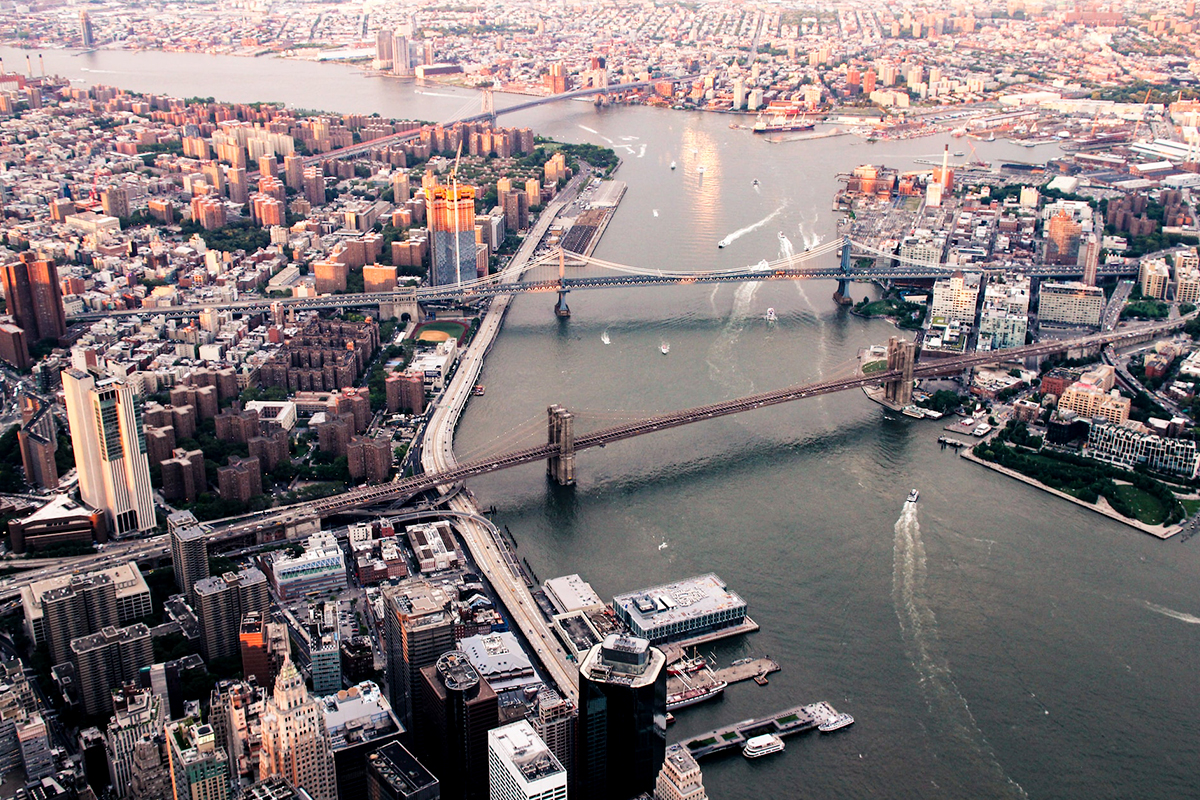
The south pedestrian walkway of the Manhattan Bridge gives one of the most revealing views of the Brooklyn Bridge. From above the East River, the full span sits against Lower Manhattan, with roadways, piers and the Brooklyn waterfront visible below.
The Brooklyn-side pedestrian entrance is near Jay and Sands streets; the Manhattan side reaches the Chinatown area around Canal Street and the Bowery. The Manhattan Bridge also has a separate bikeway, so I would use the signed pedestrian path and avoid relying on directions written before the paths were separated.
This viewpoint has three technical problems:
- The fence: I can use it as a foreground layer, place a lens close to an opening, or choose a longer focal length to blur it. I should not climb, cut or push equipment through barriers.
- Vibration: Subway trains and road traffic make the bridge move. A tripod does not guarantee a sharp long exposure here.
- Noise and pace: It is a transportation route, not an observation deck. I should keep my setup compact and remain aware of other pedestrians.
For a sharp dusk image, I would favor a stabilized lens, 1/125 sec or faster and a higher ISO over a several-second exposure. A short burst can improve the chance of one frame landing between strong vibrations.
10. Brooklyn Heights Promenade: distance creates context
The Brooklyn Heights Promenade is farther from the bridge, but it provides a broad view of the harbor, Lower Manhattan and the waterfront. A telephoto lens is useful here because the Brooklyn Bridge occupies a smaller portion of the scene.
This is a good place for weather. Low clouds can hide the upper skyline, evening light can pick out individual façades, and haze can reduce the city to layers. Instead of fighting atmospheric distance, I would let it become part of the photograph.
At 100–200mm, I would look for alignments between bridge cables, towers and the Financial District. At 35–50mm, I would include the promenade railing and visitors to establish the viewpoint as a public balcony over the city.
11. A moving viewpoint from the NYC Ferry
A ferry is not a substitute for a carefully chosen tripod position. It is a different kind of photograph: temporary, unstable and often more alive.
The East River route stops at DUMBO/Fulton Ferry, Wall Street/Pier 11 and East 34th Street. The view changes every few seconds, so I would prepare before the bridge enters the cleanest angle.
My practical settings would be around 1/1000 sec in daylight, continuous autofocus and Auto ISO. I would use 24–70mm, avoid changing lenses on an exposed deck and keep the camera strap secure. At dusk, 1/250 sec with a wider aperture may be a better compromise than motion blur from a slower shutter.
Glass adds reflections if I shoot from inside. I would place the lens close to the window, shade it with a hand or dark cloth and keep room lights behind me out of the frame. I would never lean equipment over a railing for a slightly cleaner angle.
When is the best time to photograph the Brooklyn Bridge?
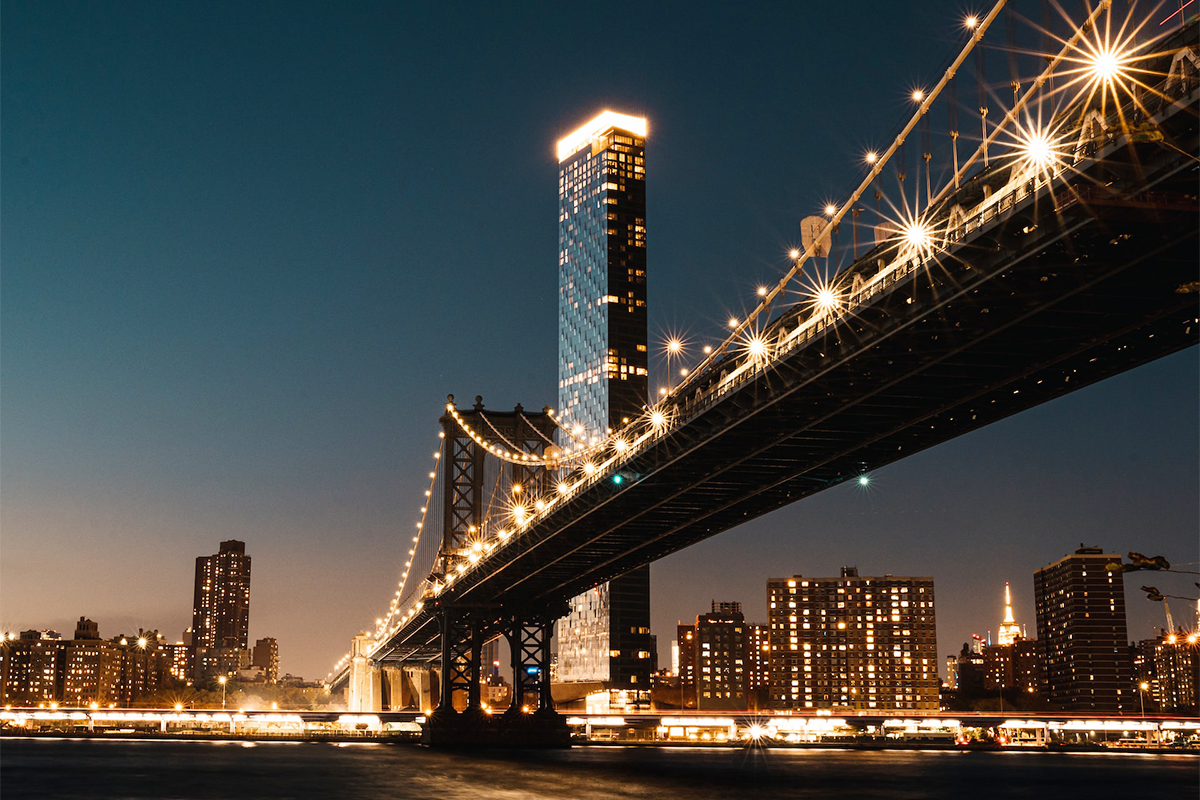
There is no single best hour because the direction of the photograph changes. The most useful question is what I want the bridge to do in the frame.
| Time | Best locations | Visual result | Practical reality |
|---|---|---|---|
| Before sunrise | Promenade, Brooklyn approach | Quiet geometry, cool ambient light | Best chance of fewer people; carry only what I can manage safely |
| Sunrise | Promenade and Manhattan-facing views | Soft light on stone, long shadows | Sun angle changes significantly by season |
| Midday | Under the bridge, tower details | Hard contrast, graphic black-and-white potential | Crowds and bright skies; useful for structure rather than romance |
| Late afternoon | Manhattan Bridge walkway, Brooklyn waterfront | Warmer side light and layered city views | Walkways and parks become busier |
| Sunset | Empire Fulton Ferry, Fulton Landing, Pier 1 | Skyline silhouettes, warm sky, reflective water | Prime crowd time |
| Blue hour | Empire Fulton Ferry, Jane’s Carousel, Fulton Landing | Balanced city lights and colored sky | Brief window; arrive with composition already chosen |
| Night | Brooklyn waterfront | Strong bridge lights and long exposures | Wind, security awareness and dark equipment on public paths |
My preferred sequence for one day
If photography were the priority, I would split the visit rather than force every view into one continuous session.
At sunrise, I would photograph the promenade and towers. I would then leave the bridge, work beneath it at Emily Warren Roebling Plaza and take a break during the least forgiving part of the day. In late afternoon, I would return to the Brooklyn waterfront, choose one composition before sunset and stay through blue hour.
That is less frantic than chasing ten pins. It also produces a more coherent set: interior geometry in the morning, exterior cityscape in the evening.
Camera settings that solve the real problems
Settings depend on light, but the location presents recurring technical challenges: moving people, bright sky, deep structural shadows, wind and vibration.
| Situation | Starting settings | Why |
|---|---|---|
| People walking on the promenade | 1/250–1/500 sec, f/5.6, Auto ISO | Holds normal movement while retaining useful depth of field |
| Architectural symmetry | 1/125 sec or faster, f/8, ISO as needed | Keeps the central structure sharp without forcing an unnecessarily tiny aperture |
| Telephoto cable details | 1/500 sec, f/5.6–f/8, Auto ISO | Reduces camera shake and subject movement |
| Blue-hour waterfront | ISO 100, f/8, 1–8 sec on tripod | Smooths water and keeps city lights controlled |
| Handheld dusk from Manhattan Bridge | 1/125–1/250 sec, widest practical aperture, Auto ISO | Counters bridge vibration better than a long exposure |
| Ferry | 1/1000 sec in daylight, f/5.6, Auto ISO | Freezes boat movement and camera movement |
| Carousel motion | 1/10–1/2 sec, low ISO, supported camera | Keeps the structure sharp while allowing intentional blur |
| Night without tripod | 1/80–1/160 sec, open aperture, Auto ISO | A sharp noisy image is more useful than a clean blurred one |
These are starting points, not prescriptions. I would watch the histogram, protect bright signs and sky, and increase ISO before accepting camera shake. Modern noise reduction can repair grain; it cannot reconstruct a tower blurred by movement.
Which lens should I bring?
I would rather carry two purposeful lenses than a heavy bag that makes the entire walk unpleasant.
A standard zoom is the most useful choice
A 24–70mm lens covers most of the route. It is wide enough for the promenade and waterfront, but it can also crop away clutter and isolate a tower. On an APS-C camera, a 16–50mm or 18–55mm kit lens serves a similar role.
An ultra-wide lens is useful beneath the bridge
A 16–35mm lens is strongest at Emily Warren Roebling Plaza and in close promenade compositions. I would use the widest end sparingly. The Brooklyn Bridge already contains strong converging lines; excessive distortion can turn elegant engineering into visual chaos.
A telephoto lens finds quieter photographs
A 70–200mm lens is valuable on the promenade, Brooklyn Heights Promenade and the Manhattan Bridge walkway. It compresses cables, isolates walkers and aligns the bridge with distant buildings. If weight matters, a compact 85mm or 135mm prime may be enough.
A phone can photograph the entire route
The main phone camera usually gives the best image quality. I would reserve the ultra-wide phone lens for strong foregrounds and close structural views, because its corners can stretch people and towers. For night scenes, I would stabilize the phone against a solid surface without placing it where it can fall or obstruct a path.
I would shoot RAW or the phone’s high-quality format when possible, clean the lens before sunset and reduce exposure slightly to protect bridge lights.
Composition ideas beyond the standard postcard
The Brooklyn Bridge has been photographed for more than a century. Originality does not require a forbidden rooftop or an unsafe roadway. It requires a more precise decision about subject and timing.
Let the cables leave the frame
The temptation is to include every cable. Cropping them can make the photograph feel larger and more immediate. I would use a telephoto lens and treat the bridge as a pattern rather than a complete object.
Photograph the interruption
A runner, delivery worker, family, fog bank or ferry can interrupt the perfect symmetry. That interruption is often what places the bridge in the present tense.
Use bad weather deliberately
Rain adds dark timber, reflections and umbrellas. Fog removes the skyline and leaves the stone tower suspended in pale space. Snow simplifies color. I would protect the camera and respect closures, but I would not assume clear weather is automatically better.
I would never pour water on a walkway to create a fake puddle. Apart from being inconsiderate, it can create a slipping hazard. If the street is wet, I will use what the weather gives me.
Make a short visual sequence
One wide frame cannot carry the whole story. I would aim for five images:
- an establishing view of the full bridge;
- a symmetrical promenade frame;
- a structural detail;
- a person for scale;
- a night or weather image that changes the mood.
That sequence is more useful for a photo essay than ten nearly identical wide photographs.
How I would edit Brooklyn Bridge photographs
The bridge needs less processing than its complexity suggests. My priority would be clean geometry and believable light.
Correct perspective before adding contrast
If the tower is meant to be symmetrical, I would first level the horizon and correct verticals. I would not force every line to be perfectly parallel; suspension bridges naturally contain curves and convergence. The correction should restore balance, not erase perspective.
Protect texture in the stone
Global clarity can make granite brittle and create halos around cables. I would use local contrast selectively, lift deep shadows only where detail matters and keep some true black beneath the deck.
Control color contamination
At night, mixed lighting can push stone toward orange, green or magenta. I would choose a neutral section of granite as a reference, then decide whether the atmosphere benefits from retaining some warm color. Perfect neutrality is not always the most honest impression of a city at night.
Remove distractions carefully
Small sensor spots, temporary litter and a bright edge at the frame boundary are reasonable corrections. Removing every pedestrian can produce strange repetitions and erase the public life of the bridge. If the final image depends on reconstructing half the walkway, I probably needed a better moment rather than a more aggressive edit.
For a free desktop workflow, my guide to editing photos in GIMP covers the core tools. The same restraint applies when using background blur: if a portrait needs separation, it is better to understand how bokeh works in photography than to paint an artificial blur around cables.
Access, transport and timing
Subway options
The most convenient station depends on the direction of the route:
| Area | Useful stations | Best for |
|---|---|---|
| Manhattan entrance | Brooklyn Bridge–City Hall; City Hall | Starting the bridge crossing from Manhattan |
| Brooklyn approach | High Street; York Street; Clark Street | Reaching DUMBO or the Brooklyn side |
| Downtown Brooklyn | Jay St–MetroTech; Borough Hall | An accessible hub with more line options |
Subway lines change for overnight and weekend work. I would check the MTA’s current service information before leaving, especially for a pre-dawn start.
Ferry
The DUMBO/Fulton Ferry landing is at Old Fulton Street and Furman Street. NYC Ferry schedules vary by season and time of day. The East River service continues to connect DUMBO with Wall Street/Pier 11 and East 34th Street, but the intermediate stops and A/B route pattern can differ. The live schedule is more reliable than a fare or timetable copied into an evergreen article.
Walking time
A direct crossing usually takes roughly 30–45 minutes without long stops. Photography changes that completely. I would budget at least an hour on the promenade and another two hours for the waterfront if I want considered frames rather than snapshots.
Accessibility and comfort
The main bridge promenade has long slopes. The Adams Street approach in Brooklyn and the Centre Street approach in Manhattan avoid stairs, but distance and gradient still matter. The Washington Street/Prospect Street access on the Brooklyn side includes a more direct connection that may not suit every mobility need.
For step-free transit planning, I would verify elevator status in the MTA app on the day. Brooklyn Bridge–City Hall is listed as accessible, but an elevator outage can change the practical route.
Brooklyn Bridge Park is a long waterfront landscape rather than one small square. Comfortable shoes, water and a realistic bag matter. Summer heat reflects from pavement; winter wind off the East River can be severe. A lightweight layer is useful even when Manhattan feels warm several blocks inland.
Photography permits, tripods and drones
Rules depend on who controls the location and how large the production is.
Personal handheld photography
A visitor using a handheld camera and not claiming exclusive use of a city walkway generally does not need a city film permit. The Mayor’s Office of Media and Entertainment also says that a handheld camera or a tripod, without exclusive use, production vehicles, stunts or similar production activity, normally falls outside its permit requirement on city property.
That does not give me a right to block a bridge, reserve a section of promenade or direct strangers out of a public space.
Brooklyn Bridge Park has its own rules
Brooklyn Bridge Park is not covered by a general NYC Parks or MOME permit. Its rules require a park permit for professional or commercial shoots and for groups larger than 20. The park’s film and photography permit page says applications must be specific to a location, equipment must be declared and permits do not provide exclusive access.
For a casual personal photograph, handheld equipment is the least complicated choice. For a commercial portrait session, campaign, crew, lighting setup or substantial tripod use, I would contact the park before the shoot rather than argue about definitions on site.
Drones are not a shortcut to an aerial view
Brooklyn Bridge Park prohibits drones within and around the park. New York City also requires an NYPD permit for lawful drone takeoff or landing outside designated model-aircraft areas, and additional city and federal rules may apply.
I would not encourage a reader to launch near the bridge. The existing aerial photograph in the old article may show an impressive angle, but it is not a normal public photo spot and should not be presented as one.
Safety and etiquette on a working bridge
The bridge is not a studio. It carries pedestrians, bicycles and vehicle traffic between two boroughs.
- I would never step into the roadway or photograph from a vehicle lane.
- I would keep tripod legs, bags and straps out of the walking line.
- I would not climb railings, cables, masonry or fences.
- I would avoid stopping at narrow pinch points.
- I would ask before making a close, identifiable portrait of a stranger.
- At night, I would keep equipment compact and remain aware of traffic, weather and other people.
- I would obey temporary barriers even if they interrupt a planned composition.
The protected bicycle lane has been on the roadway since 2021, separate from the elevated pedestrian promenade. At the approaches, however, cyclists and pedestrians can still encounter complicated street connections. NYC continued redesigning those Manhattan-side connections in 2026. Signs on the ground outrank an old article.
A short history that improves the photographs
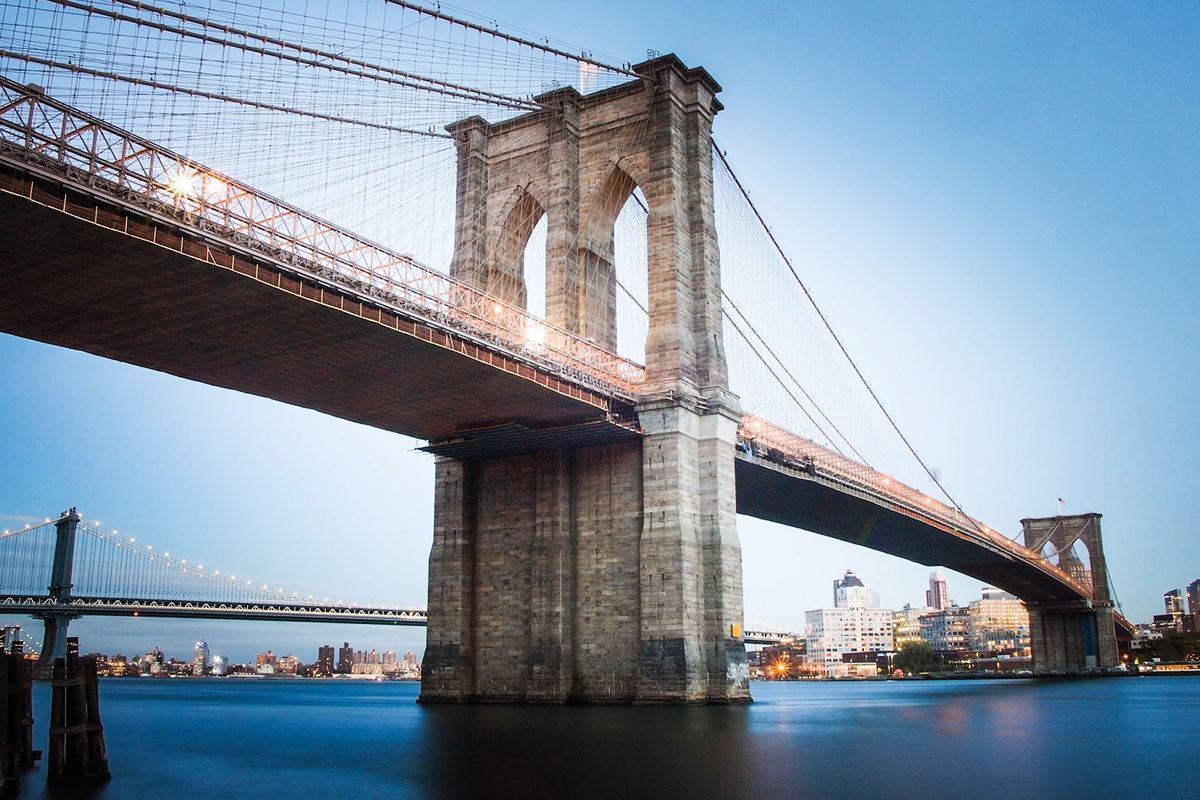
The Brooklyn Bridge was designed by John A. Roebling. Construction began in 1869. After John died, his son Washington Roebling took over as chief engineer. Washington’s health was badly damaged by decompression sickness associated with the caisson work, and Emily Warren Roebling became the crucial link between him and the construction site, developing the technical knowledge needed to communicate and oversee the work.
The bridge opened on May 24, 1883, after fourteen years of construction. At the time, it had the longest suspension span in the world. It was also the first bridge to use galvanized steel wire in its main cables on this scale, an innovation documented by the Library of Congress Historic American Engineering Record.
The bridge joined what were then the separate cities of New York and Brooklyn. Brooklyn did not become part of the consolidated City of New York until 1898. That context matters: this was not merely another crossing inside one city. It altered the relationship between two urban centers.
NYC designated the bridge and its approaches as landmarks in 1967. It had already become a National Historic Landmark in 1964. Restoration continues because the bridge is both a monument and active infrastructure.
Knowing this changes what I look for. The bridge is not only two photogenic arches. The granite, steel wire, long approaches and elevated public path are evidence of engineering choices, labor and political ambition. A good photograph can hold some of that weight.
Common mistakes I would avoid
Calling the Washington Street view the Brooklyn Bridge
It is the Manhattan Bridge. This error appeared in the earlier version of this article and in the old hero image. It should be corrected in text, captions, alt text and filenames.
Arriving at sunset and expecting an empty promenade
Sunset is useful from the Brooklyn waterfront, not for a clean, empty center-line photograph on the bridge. For fewer people, I would arrive before sunrise.
Bringing only an ultra-wide lens
An ultra-wide lens captures the architecture but also exaggerates empty foreground and edge distortion. A standard zoom or short telephoto often makes a stronger image.
Using a polarizer without watching the result
A polarizer reduces reflections; it does not strengthen them. On water or glass, it may remove the very layer I wanted to photograph. At wide focal lengths, it can also produce an uneven sky.
Assuming a tripod removes all movement
Wind, timber footfall and subway vibration can all soften a frame. On the Manhattan Bridge, a faster shutter may be more effective than a tripod. On the Brooklyn waterfront, a tripod works best when it is stable, legal and out of the public path.
Photographing from the roadway
The old article included a roadway image as if it were a photo spot. It is not. A photograph made through a vehicle window or from an authorized production is not permission for a pedestrian to enter traffic.
Frequently asked questions
Can I walk across the Brooklyn Bridge for free?
Yes. The pedestrian promenade is free and open at all times, although construction can temporarily narrow sections.
Which side has the best Brooklyn Bridge view?
The Brooklyn waterfront has the strongest complete view of the bridge with Lower Manhattan behind it. The promenade is best for symmetry and cable details. The Manhattan Bridge pedestrian walkway is best for an elevated overview.
Is Washington Street a Brooklyn Bridge photo spot?
No. The bridge framed by warehouses on Washington Street in DUMBO is the Manhattan Bridge. It is close enough to add to the same walk, but it should be labeled correctly.
Is sunrise or sunset better?
Sunrise is better for a quieter pedestrian promenade. Sunset is better from Empire Fulton Ferry, Fulton Ferry Landing and Pier 1, where the bridge and Manhattan skyline can be photographed across the water.
Can I use a tripod?
Small personal use without blocking public access may be possible on city property, but location-specific rules apply. Brooklyn Bridge Park has its own permit system for professional and commercial photography, larger groups and equipment. I would use a tripod only where it is stable, permitted and not obstructing anyone.
Can I fly a drone over the Brooklyn Bridge?
Do not assume so. Brooklyn Bridge Park prohibits drones, New York City requires a permit for drone takeoff or landing outside designated model-aircraft fields, and FAA rules still apply. This is a regulated urban location, not a casual launch site.
How long should I allow for the bridge and DUMBO?
Three to four hours is a reasonable photography route from the Manhattan entrance across the bridge and through the main DUMBO waterfront viewpoints. A sunrise session and a separate sunset session produce better light with less rushing.
What is the best lens for Brooklyn Bridge photography?
A 24–70mm full-frame equivalent is the most versatile. Add 70–200mm for cable details and distant skyline alignments, or 16–35mm for the underside and very close architectural frames.
Is Brooklyn Bridge Park open at night?
The park’s current general hours are 6 a.m. to 1 a.m., seven days a week, but individual facilities and lawns can have separate hours or temporary closures. I would check park alerts before a late session.
Final thoughts
The Brooklyn Bridge rewards a slower kind of planning. The obvious photograph is available to everyone, which is not a reason to avoid it. It is a reason to decide more carefully what the photograph is about.
If I want order, I will use the promenade at sunrise. If I want scale, I will stand beneath the bridge at Emily Warren Roebling Plaza. If I want the bridge as part of New York rather than apart from it, I will work from Empire Fulton Ferry through blue hour. And if I want to understand the whole structure, I will look back from the Manhattan Bridge and let the city surround it.
The most useful change to my original guide is not another pin on a map. It is accuracy: the right bridge, the right public access, the right expectations and no invented visit. That gives the photographs a better chance of feeling observed rather than assembled.