
When I first assembled these photos of Santa Monica Pier in 2023, I had not stood on its wooden deck. I knew the place in the way many distant landmarks first reach us: as an arrangement of familiar shapes. A Ferris wheel above the Pacific. A roller coaster curling over timber pilings. The sun sinking beside both.
The photograph came before the place.
That distance is worth acknowledging. This is not a diary of a day I spent in Santa Monica, and I do not want to disguise research as memory. It is a close reading of six photographs that first drew me to the pier, followed by the practical guide I would want before photographing it for myself.
The distinction also makes the pictures more interesting. Santa Monica Pier is so widely photographed that it risks becoming a symbol rather than a real structure. At sunset, it can look like a perfectly arranged piece of California: amusement lights, warm sky and an ocean without edges. Look longer and other details begin to appear—the old timber beneath the rides, people reduced to silhouettes on the sand, a century of alterations held over moving water.
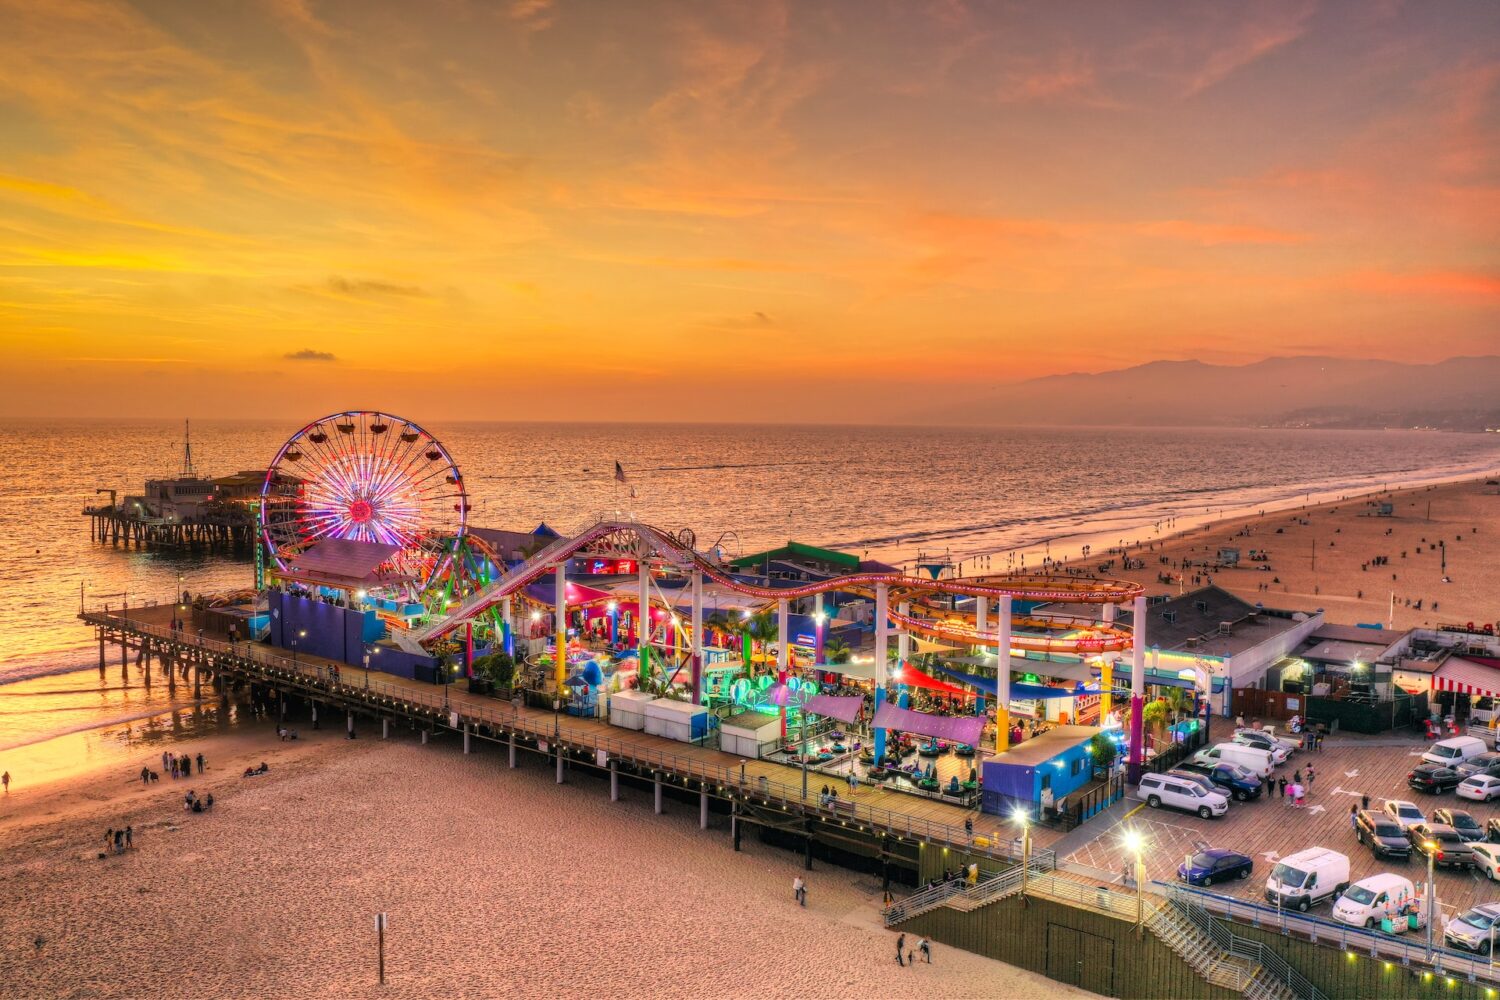
Pacific Park at sunset. The elevated view shows how densely the rides, buildings and walkways are fitted onto the pier.
The photograph before the history
The broad sunset view above contains most of what made me stop: the Pacific Wheel, the roller coaster, the beach and the long California coast fading into haze. Its color is immediate, but its geometry holds the frame together. The wheel creates a circle, the roller coaster draws a loose horizontal line and the shore carries the eye into the distance.
It is easy to read the image as a single attraction. Historically, the pier was assembled in stages.
Santa Monica's Municipal Pier opened in 1909 as a public-utility structure. In 1916, amusement entrepreneur Charles I. D. Looff opened a pleasure pier beside it and built the Looff Hippodrome, the elaborate carousel building that still stands near the entrance. The current carousel is not Looff's original machine: it was built by the Philadelphia Toboggan Company in 1922 and installed in the Hippodrome in 1947. The City of Santa Monica gives a clear account of that distinction in its history of the Looff Hippodrome.
The Hippodrome became a National Historic Landmark in 1987. Pacific Park arrived much later, opening in 1996. Its Pacific Wheel made its solar-powered debut in 1998 and is now described by the park as the world's only solar-powered Ferris wheel. The present wheel carries more than 174,000 LED lights, which is why the structure changes so dramatically after sunset. Pacific Park publishes the current specifications.
This compressed history explains something visible in the photographs. Santa Monica Pier does not have the visual unity of a monument designed all at once. Old timber, a historic carousel building, modern rides, restaurant roofs, signs and crowds compete for space. That visual congestion is not a defect to remove from a photograph. It is the character of the place.
Six photographs, six ways of seeing the pier
The six existing images do not document an entire visit. They concentrate on the hour photographers naturally favor, when daylight recedes and the amusement park begins to generate its own color. Within that narrow period, however, the pier changes several times.
1. Pacific Park as graphic design
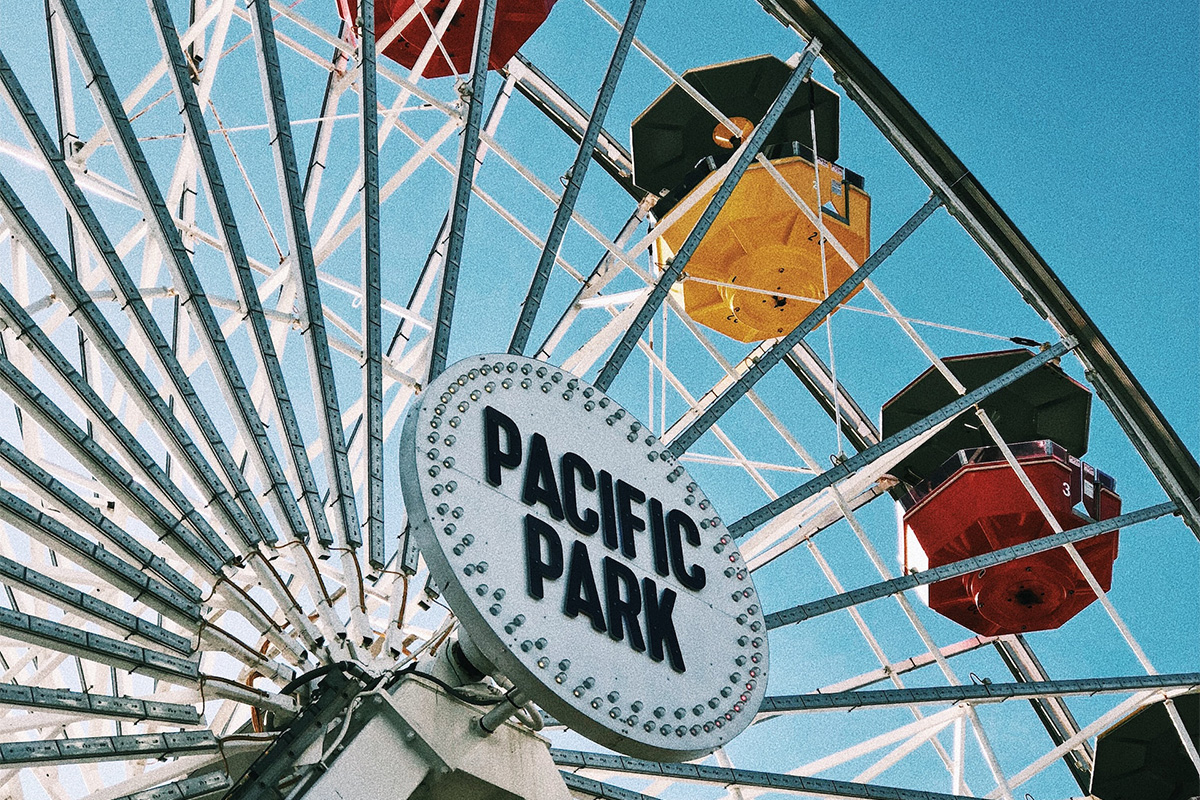
A close view turns the Pacific Wheel into a pattern of spokes, steel and primary colors.
The strongest part of this photograph is not scale but compression. The wheel is too large to fit comfortably into the frame, so the photographer lets it break against the edges. The Pacific Park sign becomes an anchor while white spokes divide the blue sky into irregular shapes.
This is a useful lesson for a familiar landmark: I do not always need to show the whole thing. A medium telephoto lens can remove the beach, crowds and horizon and turn the wheel into an abstract study of circles and lines. A 50mm or 85mm lens would be a natural starting point; a longer lens would compress the gondolas even more.
The slightly coarse texture and restrained palette also separate this image from the polished sunset views. It feels closer to an old seaside amusement park than a contemporary Los Angeles attraction.
2. The pier from the sand
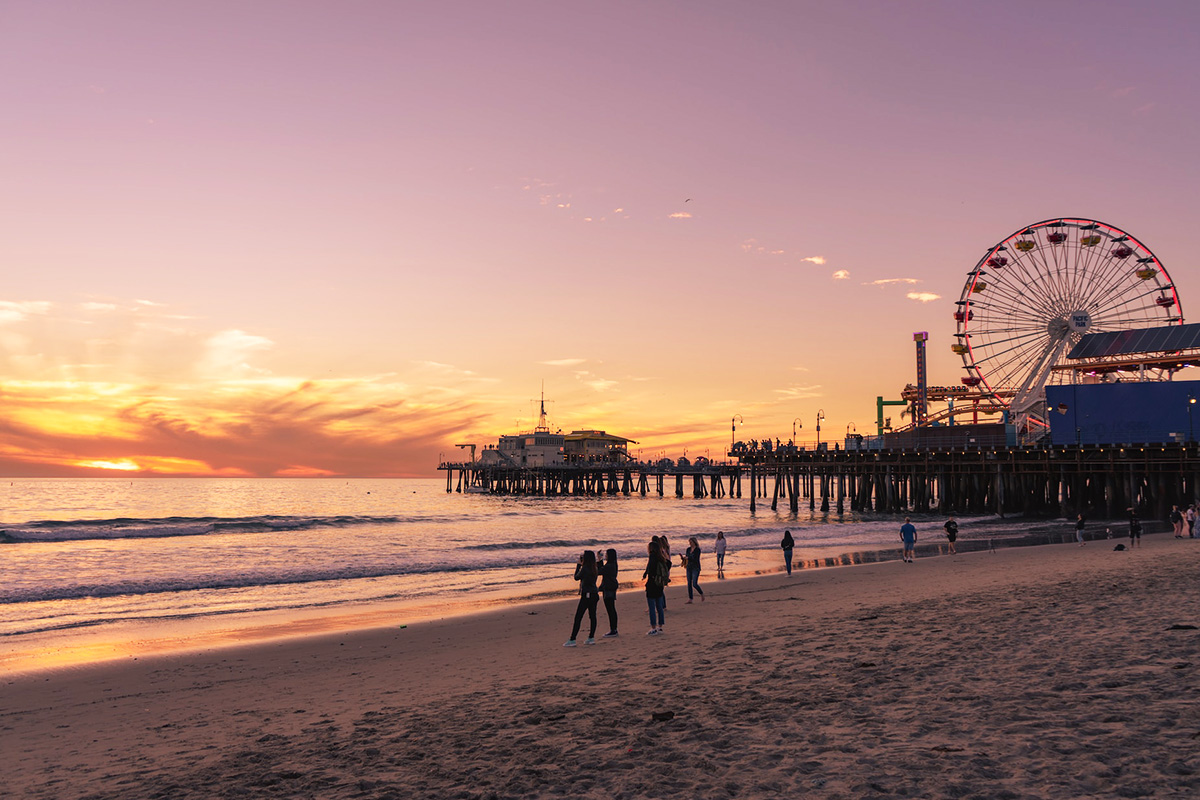
The view from the beach south of the pier gives the structure room to extend across the frame.
This is the classic public view and, for a first visit, probably the most dependable. From the sand south of the pier, the ocean opens on the left while the rides and buildings remain legible on the right. The people along the waterline provide scale; without them, the pier could feel like a miniature.
I would resist the temptation to exclude every passerby. Santa Monica Pier is a public place rather than an isolated landscape. Small figures walking through reflected light can organize the foreground and give the scene its rhythm. The challenge is placement: overlapping silhouettes become a dark mass, while a few separated figures read clearly.
This photograph also shows why arriving before sunset matters. The sky has begun to warm, but there is still enough light on the beach to retain texture in the sand and clothing.
3. The last minutes of direct light
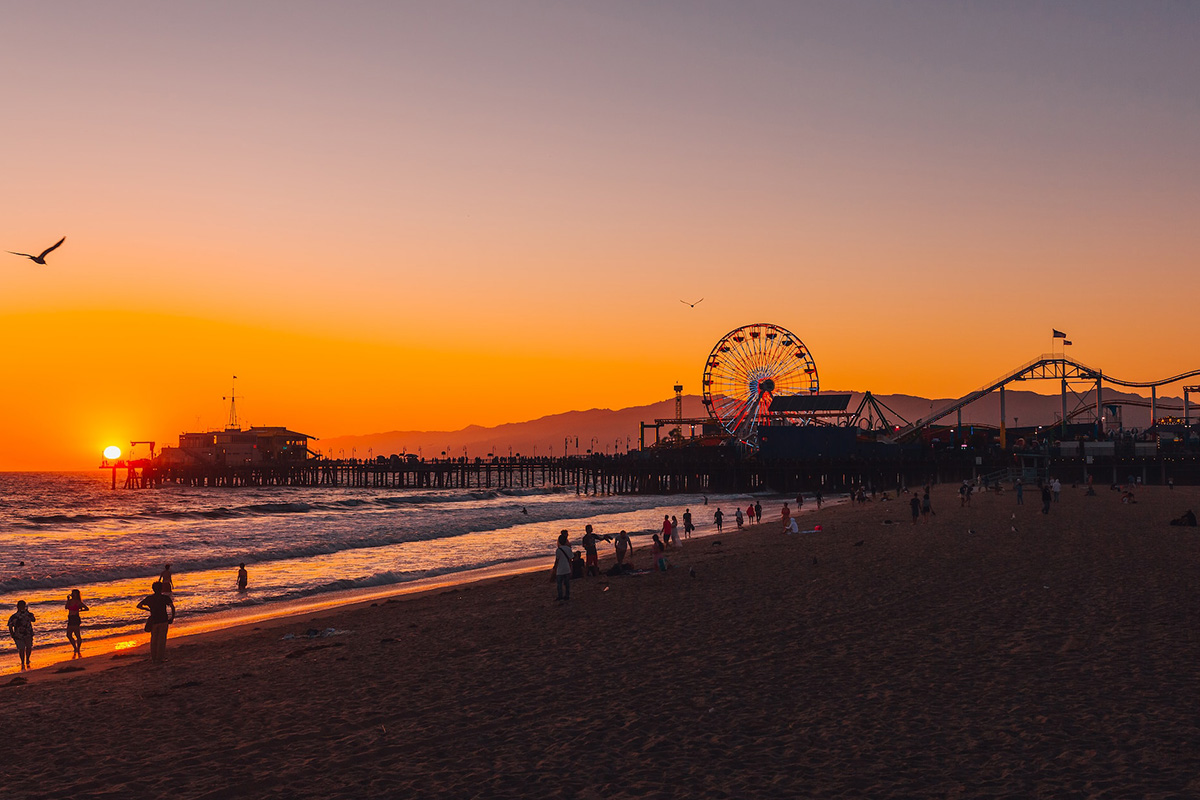
Exposing for the bright sky turns the pier into a silhouette and lets the narrow reflection on the water lead toward the sun.
The next photograph was made only a little later, yet it belongs to another visual world. The pier has lost most of its surface detail. The sun sits close to the horizon, the beach has become a dark field and the wheel is recognizable by outline rather than color.
Here I would expose for the sky and accept the silhouette. Trying to recover every shadow can flatten the atmosphere and introduce noise. A small aperture such as f/8 or f/11 can preserve depth and may produce a more defined sunstar when the sun meets an edge, although the exact effect depends on the lens.
The position of sunset changes substantially through the year. From Southern California, it moves toward the southwest in winter and the northwest in summer. A composition that places the sun neatly beside the pier in one season may put it behind a ride—or well outside the frame—in another. Before a dedicated shoot, I would check an ephemeris rather than rely on a photograph made in a different month.
4. Blue hour and the second exposure
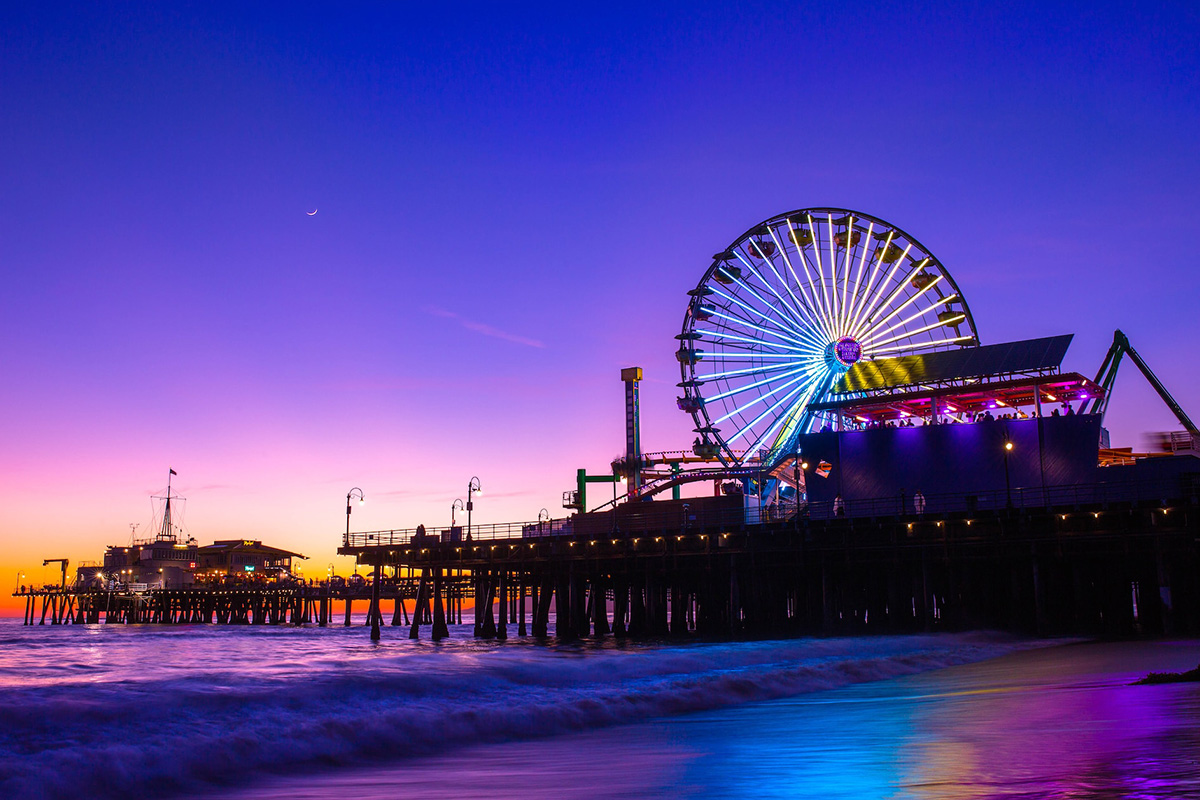
After sunset, the Pacific Wheel becomes the brightest object and the wet shoreline begins to carry its color.
Many photographers pack their equipment when the sun disappears. At the pier, that is when the second part of the shoot begins.
Blue hour creates a balance that full darkness cannot. There is still color in the sky and separation along the horizon, but the wheel and amusement lights are bright enough to register. In this frame, the small crescent moon prevents the upper-left sky from becoming empty, while the reflected blue and magenta light gives the foreground water an unnatural, almost theatrical color.
A tripod is useful here, provided it can be placed without obstructing the busy path or beach access. I would begin at ISO 100, around f/8, and let the shutter run for several seconds. A longer exposure smooths the water and turns the moving wheel into a circle of light; a shorter one preserves more detail in individual gondolas. Both can work, but they describe motion differently.
Bright LEDs are easy to overexpose. I would watch the red, green and blue channels separately and bracket a few frames. Recovering a dark beach is easier than restoring lights that have clipped to featureless white.
5. The aerial view
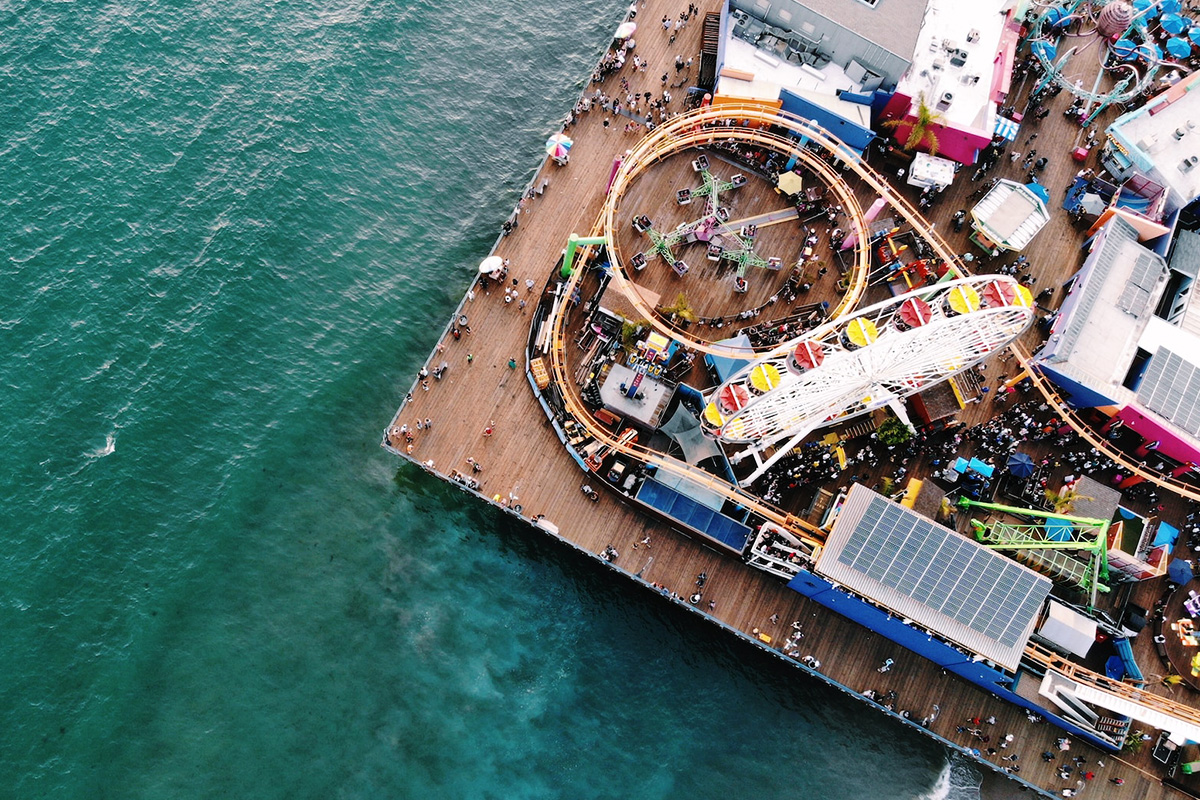
My favorite image in the original collection: the park is compressed into one corner while the ocean provides a field of negative space.
This remains my favorite of the six images. From directly above, the Pacific Wheel loses its familiar circular face and becomes a white bar across the roller coaster. The park is busy, but the open water gives the frame somewhere to breathe. The dividing line between attraction and ocean is unusually clean.
It is also the image that requires the most caution as inspiration. An aerial photograph is not an invitation to arrive and launch a drone over a crowded pier. Airspace, city rules, events and commercial-production requirements can all affect what is permitted. Santa Monica has prohibited drone operation during major public events, and a commercial still or video production on public property requires a permit from Film Santa Monica. Anyone considering an aerial shoot should check current city rules and FAA airspace information for the exact date and operation.
For most visitors, an elevated land-based viewpoint is the better answer. The area around Ocean Avenue and Palisades Park can provide height without placing an aircraft over people.
The best Santa Monica Pier photo spots
I would plan the first visit around a small number of positions rather than spend the best light walking without a clear idea. Each viewpoint solves a different photographic problem.
| Photo spot | What it offers | Useful lens | Best light |
|---|---|---|---|
| Beach south of the pier | The classic side profile, sunset, reflections and people in the foreground | 24–70mm | Late golden hour through blue hour |
| Beach north of the pier | A less familiar angle with more coastline and the possibility of distant mountains in clear conditions | 24–70mm or 70–200mm | Morning or late afternoon |
| Beneath the pier | Repeating timber pilings, symmetry, reflections and strong leading lines | 16–35mm | Overcast light or lower tide |
| On the pier at Pacific Park | Signs, wheel details, rides, food stands and street life | 35mm, 50mm or 85mm | Daylight into early evening |
| Western end of the pier | Open ocean, fishermen and a view back toward the city and coast | 24–70mm | Morning, sunset or blue hour |
| Ocean Avenue and Palisades Park | Elevated context and compressed views of the coast | 70–200mm | Clear late-afternoon light |
Photographing beneath the pier
The repeating pilings are an obvious wide-angle composition, but the location deserves more care than the photograph suggests. Tide and surf determine how much beach is available, and wet timber and sand can be slippery. I would check the tide before going underneath, keep an exit route in view and never place equipment where a larger wave can reach it.
Perfect central symmetry is one option. Another is to stand slightly off-axis and let the columns form overlapping layers. The second approach often gives a stronger sense of depth and is less dependent on an empty central corridor.
Photographing on the pier
On the deck, the visual problem changes from empty space to clutter. A wide lens records everything but may say very little. I would look for small relationships instead: a gondola crossing a clean patch of sky, a hand on a carousel horse, a row of lamps, fishermen at the rail or faces lit by an arcade.
A compact camera or a single small prime lens is often more useful than a conspicuous bag of equipment in a crowd. It also makes it easier to move without blocking people.
The Route 66 sign
The “End of the Trail” sign has become one of the pier's standard photographs. Santa Monica Pier was dedicated in 2009 as the symbolic western terminus of Route 66, although the highway's historic endpoint changed over time and was not originally on the pier. I would photograph the sign as part of the pier's modern mythology rather than treat it as a simple historical fact.
When is the best time to photograph Santa Monica Pier?
There is no hour that solves every photograph. The best time depends on whether I want an empty pier, saturated amusement-park color, a clean sunset or people moving through the frame.
Early morning
Morning should offer fewer visitors, cooler light and more room to study the structure. It is a good period for the pier deck, fishermen, signs and architectural details. The official pier hours are currently 6 a.m. to 10 p.m. daily, so access before sunrise depends on the season. The beach can still provide exterior views when the deck itself is closed, subject to current access rules.
The sun rises inland rather than over the Pacific, so this is not the obvious choice for a sun-on-the-horizon ocean photograph. It can, however, place softer light on west-facing scenes and produce cleaner air than a hazy afternoon.
Midday
Midday is usually dismissed by landscape photographers, but Pacific Park's white structures, blue sky and bright gondolas suit hard light. It is the right time to look for graphic details like the close Pacific Wheel photograph above.
A circular polarizer can reduce glare on water and deepen the sky, but its effect can become uneven on an ultra-wide lens. I would rotate it carefully and check the corners rather than assume more polarization is always better.
Golden hour
For the familiar pier silhouette, I would arrive at least 60 to 90 minutes before sunset. That leaves time to find the current position of the sun, watch the tide and decide whether to work north or south of the pier.
The final minutes can change quickly. I would establish one dependable composition first and only then look for variations. Constantly moving during the best light often produces several almost-finished pictures instead of one deliberate frame.
Blue hour and night
Blue hour is arguably the most distinctive period because natural and artificial light briefly carry equal weight. The Pacific Wheel's light program is generally visible from dusk, but ride and lighting schedules can change for special events or maintenance.
Once the sky becomes fully black, the contrast is harsher. A fast prime lens becomes useful for handheld photographs of people and details, while a tripod allows longer exposures of the wheel and water. Pacific Park's operating hours vary by season and weather, so I would check the official calendar rather than assume the rides will remain open late.
Seasons and the marine layer
| Period | Photographic character | What I would prepare for |
|---|---|---|
| Winter | Earlier sunsets and the sun setting farther southwest | Cooler evenings, lower sun and a composition from the south beach |
| Spring | Longer days and a mix of clear and overcast conditions | Flexible plans and a light layer for the evening |
| Late spring to early summer | Frequent coastal cloud or “June gloom,” especially in the morning | Graphic details, muted color and long exposures if the sunset disappears |
| Late summer | Later sunsets, warmer evenings and larger crowds | More time to secure a position and protect equipment from sand |
| Autumn | Often a useful balance of warm light, earlier sunsets and somewhat lighter crowds | A full golden-hour-to-blue-hour sequence |
Cloud does not automatically ruin the shoot. A gray sky can lower contrast beneath the pier and simplify street photographs. The only failed weather is weather for which I brought no alternative idea.
Camera settings I would use as starting points
These are starting points, not prescriptions. Light, subject movement, stabilization and the intended result matter more than copying a number.
| Scene | Starting settings | What to watch |
|---|---|---|
| Sunset landscape | ISO 100, f/8–f/11, shutter as required | Protect the sky; bracket if the pier is too dark |
| Pier silhouette | ISO 100, f/8, expose for highlights | Do not force detail back into intended silhouettes |
| Moving ride in daylight | 1/500–1/1000 sec, Auto ISO, f/4–f/8 | Focus tracking and clean separation from the background |
| Blue-hour wheel | ISO 100, f/8, approximately 1–8 sec on a tripod | Clipped LEDs, vibration and people crossing the frame |
| Wheel as a light circle | ISO 100, f/8–f/11, several seconds | Experiment because ride speed changes the pattern |
| Handheld night detail | 1/125 sec or faster, f/1.8–f/2.8, ISO 800–3200 | Subject movement matters more than perfectly clean shadows |
| People along the water | 1/250 sec for sharp figures or 1/15–1/30 sec for movement | Stabilization, wave movement and overlap between silhouettes |
I would also shoot RAW when the light is changing rapidly. Sunset scenes often contain enough dynamic range to make later color and highlight decisions important. RAW does not excuse careless exposure, but it gives the file more room than a finished JPEG.
A two-hour photography plan
If I were planning a first shoot, I would keep it simple.
90 minutes before sunset: scout from the beach
I would begin south of the pier, check the tide and make one wide composition while the beach still has detail. This is also the time to identify foreground elements—people, reflections or wave patterns—without the pressure of rapidly changing light.
45 minutes before sunset: reduce the frame
Once the safe composition is established, I would move closer or use a longer lens for the wheel, coaster and lamps. This is the period for photographs that do not depend on the sun being in a precise position.
Sunset: stay with one composition
I would return to the strongest beach position and watch how people move through it. The light may peak for less than a minute. A clean frame usually comes from patience rather than rapid changes of lens and position.
10 to 30 minutes after sunset: work through blue hour
This is when I would place the camera on a tripod, lower the ISO and make a sequence of exposures as the sky darkens. Instead of choosing one shutter speed, I would record several: a short exposure for detail in the wheel, a longer one for motion and a bracket for difficult contrast.
Final 30 minutes: walk onto the pier
After the wide view, I would finish with smaller scenes under artificial light—signs, food stands, ride details and people at the railing. The camera settings will be less perfect, but the photographs may feel more specific to the place.
Practical information for photographers in 2026
Operational details change more quickly than photographic principles. These were checked for the August 2026 update and should be verified again before traveling.
| Item | Current practical information |
|---|---|
| Pier access | The Santa Monica Pier is currently open daily from 6 a.m. to 10 p.m. |
| Pacific Park | Open year-round, but ride, food and retail hours vary with season, weather and events. Check the daily calendar. |
| Historic carousel | Currently listed as open Monday and Thursday through Sunday, 11 a.m.–7 p.m. |
| Heal the Bay Aquarium | Currently open Saturday and Sunday, 12–4 p.m., beneath the carousel. Check for closures or special events. |
| Metro | Take the Metro E Line to Downtown Santa Monica at 4th Street and Colorado Avenue; the pier is about a 10-minute walk west. |
| Parking | Lot 1 North at 1550 Appian Way, downtown public structures and Beach Lot 4 South are among the listed options. Availability and prices vary. |
| Cycling | The Marvin Braude Bike Trail runs past the pier. Bikes are allowed on the pier, but crowded conditions may make walking safer. |
| Commercial photography | Commercial filming or still photography on public property requires a permit through Film Santa Monica. |
| Construction | The pier remains open during replacement of the access bridge, but traffic patterns and parking access can change. Completion is expected by the end of 2027. |
The most useful current sources are the pier's official FAQ, its directions and parking page, Pacific Park, Heal the Bay Aquarium and Film Santa Monica.
The bridge project deserves particular attention. The pier is fully open, but the official FAQ warns of detours, delays and altered parking access while the bridge is replaced. For a sunset shoot, an unexpected traffic delay can cost the only light that mattered; public transport or arriving well ahead of time may be the more reliable choice.
What I would carry
The pier does not require unusual equipment. It rewards a small kit that can move between the beach and a crowd.
- A 24–70mm lens for the classic beach view, the pier deck and most general scenes.
- A 50mm or 85mm lens for wheel details, signs and people without an exaggerated wide-angle background.
- A compact tripod for blue hour, used only where it does not obstruct access.
- A lens cloth and blower because sea spray and sand find the front element quickly.
- A spare battery because long exposures, image review and cool evening air can shorten battery life.
- A simple rain cover or plastic bag for spray and unexpected coastal weather.
- Minimal luggage rather than an open camera bag on the sand.
I would leave equipment changes until I am away from blowing sand. A few seconds of care are cheaper than cleaning a sensor after the trip.
Preparing the finished photographs
Sunset photographs often invite too much editing. Saturation, clarity and shadow recovery can each look convincing in isolation, then become excessive when combined. I would begin by correcting exposure and white balance, control the bright LEDs separately and keep some density in the silhouetted pier.
The wheel's lights can push individual color channels to clipping even when the overall histogram looks acceptable. Checking the red, green and blue histograms separately helps preserve color in the brightest areas.
For web use, I export a separate copy rather than upload the full camera file. My browser-based Image Resizer can create the required dimensions locally, while the Image Compressor reduces delivery size and removes unnecessary metadata without sending the photograph to a remote service.
A place first encountered through pictures
The old version of this article tried to turn the pier into a complete list: rides, restaurants, shops, beaches, history and hashtags. The photographs were present, but the writing rarely stopped to look at them.
That now seems backward to me.
The six images do not prove what a day at Santa Monica Pier feels like. They leave out the noise, the queues, the wind, the smell of food and the ordinary hours when the sky does nothing dramatic. But they do explain why the structure continues to attract cameras. It offers a rare combination of landscape and machinery, nostalgia and commercial color, open ocean and dense public life.
My favorite remains the overhead frame, where the amusement park is pressed into one corner and the Pacific occupies the rest. Yet the most useful photograph may be the quieter view from the beach, with people spread along the waterline. It reminds me that scale does not come from the Ferris wheel alone. It comes from the small human figures beside it.
A place encountered through photographs should remain provisional. The real pier—crowded, weathered and changing with the light—will always be more complicated than its sunset image. That is not a disappointment. It is the reason to keep looking.
Research used for this update
- Santa Monica Pier: Official website and visitor information
- Santa Monica Pier: Frequently asked questions
- Santa Monica Pier: Directions and parking
- City of Santa Monica: History of the Looff Hippodrome
- Pacific Park: Pacific Wheel specifications
- Heal the Bay Aquarium: Current visitor information
- Film Santa Monica: Permit requirements