
The street rarely arranges itself when I arrive. People cross too early, the light lands on the wrong wall, a delivery van blocks the background, and the promising figure in a red coat turns away just before everything aligns.
That is not a failure of the day. It is the normal condition of street photography.
When I walk with a camera, I am not really looking for “something interesting.” That instruction is too broad to be useful. I am looking for a relationship: a gesture that repeats a shape in the architecture, a face carried through a reflection, one person interrupting a pattern, or a brief strip of light that turns an ordinary crossing into a stage.
The earlier version of this guide listed reflections, colours, architecture and portraits as separate ideas. They are still good starting points, but they become much more useful when turned into assignments. An assignment gives me a reason to stay after the first frame, change position and wait for a better arrangement.
The 25 ideas below are not a checklist of visual tricks. They are ways of paying attention. Some involve people; several do not. All can be attempted close to home.
Choose an idea and start here
| # | Assignment | What to look for | Useful starting setup |
|---|---|---|---|
| 1 | One corner, one hour | Repeated movement through a fixed background | 28–50mm, 1/250 sec, Auto ISO |
| 2 | Gestures | Hands, glances, posture and small interactions | 35–85mm, continuous AF |
| 3 | Hard light and shadows | A lit zone where people enter briefly | Expose for highlights, –0.3 to –1 EV |
| 4 | Colour echoes | Two or three matching colours across the frame | Daylight white balance, RAW if available |
| 5 | Reflections | Glass, puddles, polished metal and screens | 28–50mm, move centimetres at a time |
| 6 | Layers | Foreground, subject and background acting together | 28–35mm, f/5.6–f/8 |
| 7 | Frames within frames | Doors, windows, arches and gaps | Single-point AF, careful edges |
| 8 | Juxtaposition | Two elements creating a third meaning | 35–50mm, background first |
| 9 | Pattern and interruption | Repetition broken by one person or object | f/5.6–f/11 |
| 10 | Silhouettes | Recognisable outlines against bright light | 1/500 sec, meter for background |
| 11 | Rain | Umbrellas, wet colour, fogged glass | Weather protection, 1/250 sec or slower blur |
| 12 | Windows and thresholds | Public life divided by inside/outside | 35–50mm, watch reflections |
| 13 | Public transport | Waiting, boarding, repetition and compression | 28–50mm, silent mode where appropriate |
| 14 | People at work | Skill, tools, routine and environment | Ask when close or sustained |
| 15 | Quiet streets | Absence, traces and overlooked edges | 35–70mm, slower pace |
| 16 | Urban animals | Animals interacting with human design | 1/500–1/1000 sec, continuous AF |
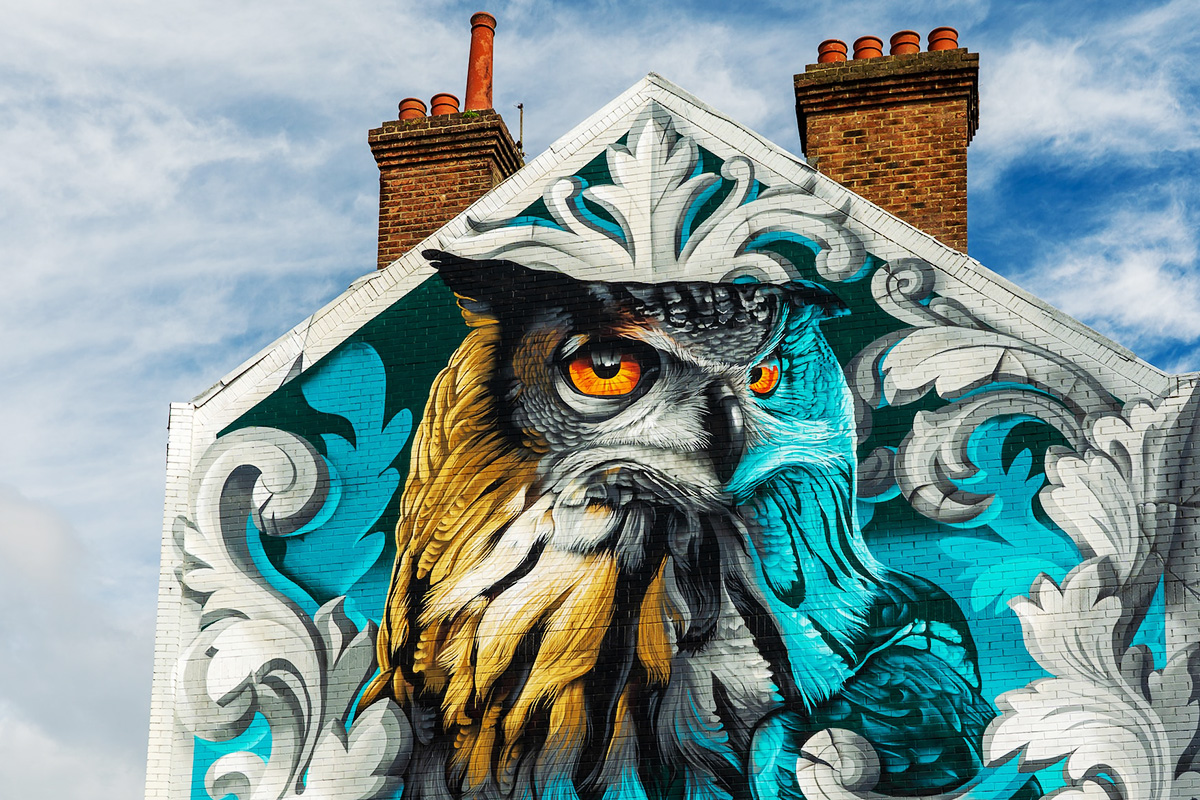
| 17 | Street art in context | Mural plus neighbourhood, scale and use | 24–50mm, avoid copying only the artwork |
| 18 | Text and signs | Words contradicted or completed by life | 35–70mm, wait for the relationship |
| 19 | Change your height | Ground level, stairs, bridges and balconies | Tilting screen, keep traffic awareness |
| 20 | Motion | Blur, panning and light trails | 1/8–1/60 sec; tripod only where permitted |
| 21 | Night | Pools of light, reflections and isolation | Wide aperture, Auto ISO, 1/125 sec minimum |
| 22 | Asked portraits | A brief conversation and clear permission | 35–85mm, simple background |
| 23 | One focal length | Consistent distance and visual grammar | One prime or fixed zoom position |
| 24 | Repeat one route | Change across weather, time and season | Same route and approximate viewpoints |
| 25 | Build a five-frame story | Opening, character, detail, transition, ending | Any camera; sequencing matters most |
If I feel visually stuck, I choose only one row. Trying to chase reflections, portraits, architecture, motion and colour on the same walk usually produces a busy card and no coherent idea.
What street photography is—and what it is not
The Museum of Modern Art describes street photography as a form almost as old as photography itself, built around finding subjects in streets and public places and recording spontaneous moments.
That definition is broad for a reason.
Street photography does not have to contain a face. It can be about a doorway worn smooth by use, a temporary reflection, the choreography of commuters or the way a neighbourhood changes after dark. It does not have to be made literally on a street, either; stations, markets, parks and other publicly accessible spaces can hold the same kind of observation, subject to their own rules.
It is also not the same as street art photography. Graffiti and murals can be subjects within a street photograph, but simply reproducing another artist’s wall straight-on is closer to documentation of the artwork. A street photograph adds context, use, tension, scale or an event around it.
Finally, “candid” is not a synonym for “ethical.” A photograph can be legal to make and still be humiliating, intrusive or needlessly cruel. That judgement belongs inside the process, not at the end after the image has already been published.
How I look for a street photograph
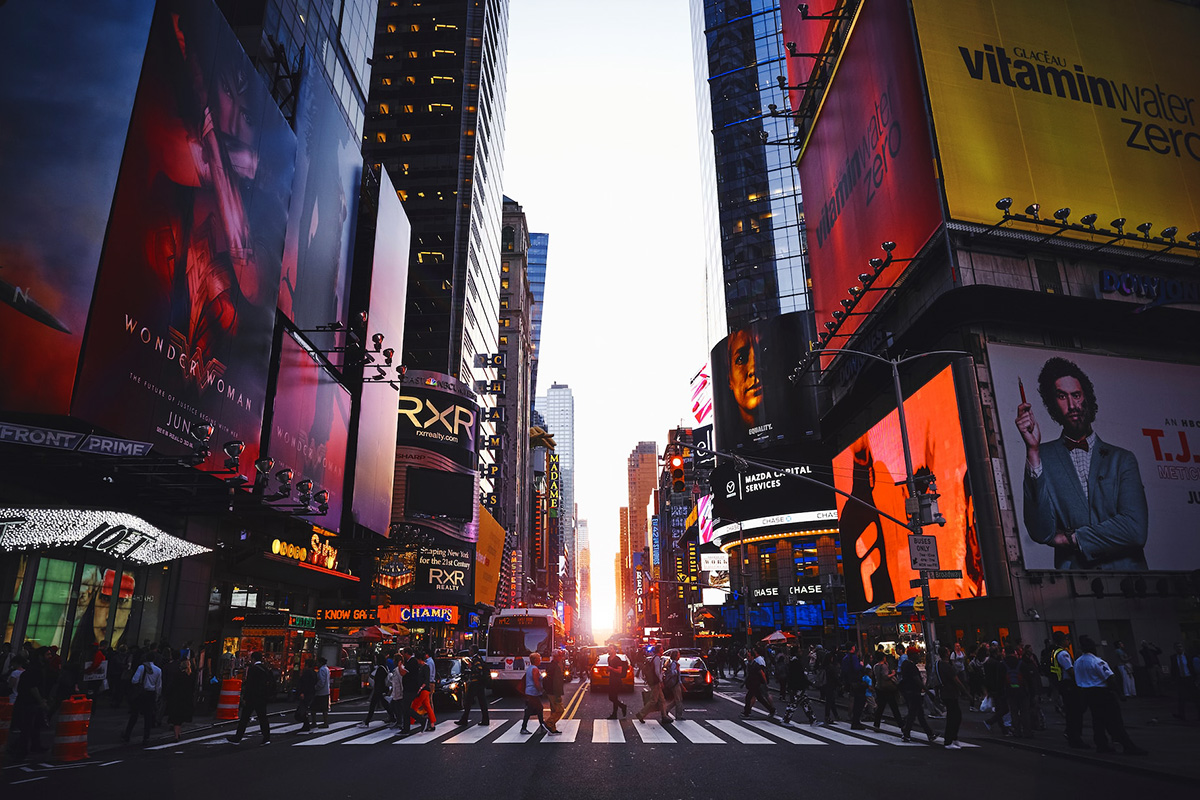
Walking farther does not automatically reveal more. Sometimes the most productive decision is to stop.
I begin with the background
A strong background can wait. A clean wall, shaft of light, repeating windows or layered shopfront gives the frame structure before the subject arrives.
I check the edges first: bright signs, bins, half-cut figures and poles growing from empty space. Then I decide where a person would need to enter for the composition to work. This turns waiting into something active.
I make the obvious frame, then stay
The first photograph proves the idea exists. It is rarely the finished version. I move left or right, lower the camera, remove one object from the edge and wait for a clearer gesture.
Five minutes can produce a different picture without changing the location at all.
I watch how the scene repeats
Cities have rhythms. A pedestrian signal releases people in waves. A waiter returns to the same table. A train door creates the same rectangular frame every few minutes. Repetition makes an unpredictable street partly predictable.
Once I recognise the cycle, I can prepare exposure and focus before the important moment instead of reacting after it.
I leave when the situation asks me to
No photograph is worth escalating a confrontation or making someone feel trapped. If a person objects, I lower the camera, listen and move on. The fact that I spent time waiting does not give me ownership of the moment.
25 practical street photography ideas
1. Stay on one corner for one hour
Choose a corner with a useful background and enough pedestrian movement. Do not circle the block. Let the same place show you how it changes.
During the first ten minutes, photograph obvious arrangements. After that, look for repetition: delivery workers using the same entrance, cyclists cutting through one patch of light, people stopping at the same line or reflections changing as doors open.
Assignment: Make no more than 30 frames. Select three that could only have been made from this corner.
Why it works: Restriction replaces the pressure to find an entire city with the smaller task of understanding one stage.
2. Photograph gestures instead of people
A face can dominate so completely that I forget what the body is doing. Hands passing change, someone leaning to hear, crossed feet beneath a café table or two strangers mirroring each other can carry the photograph without a conventional portrait.
Gesture is especially useful when I want human presence without making identity the subject.
Assignment: Make ten frames in which the important action still reads if the faces are cropped or turned away.
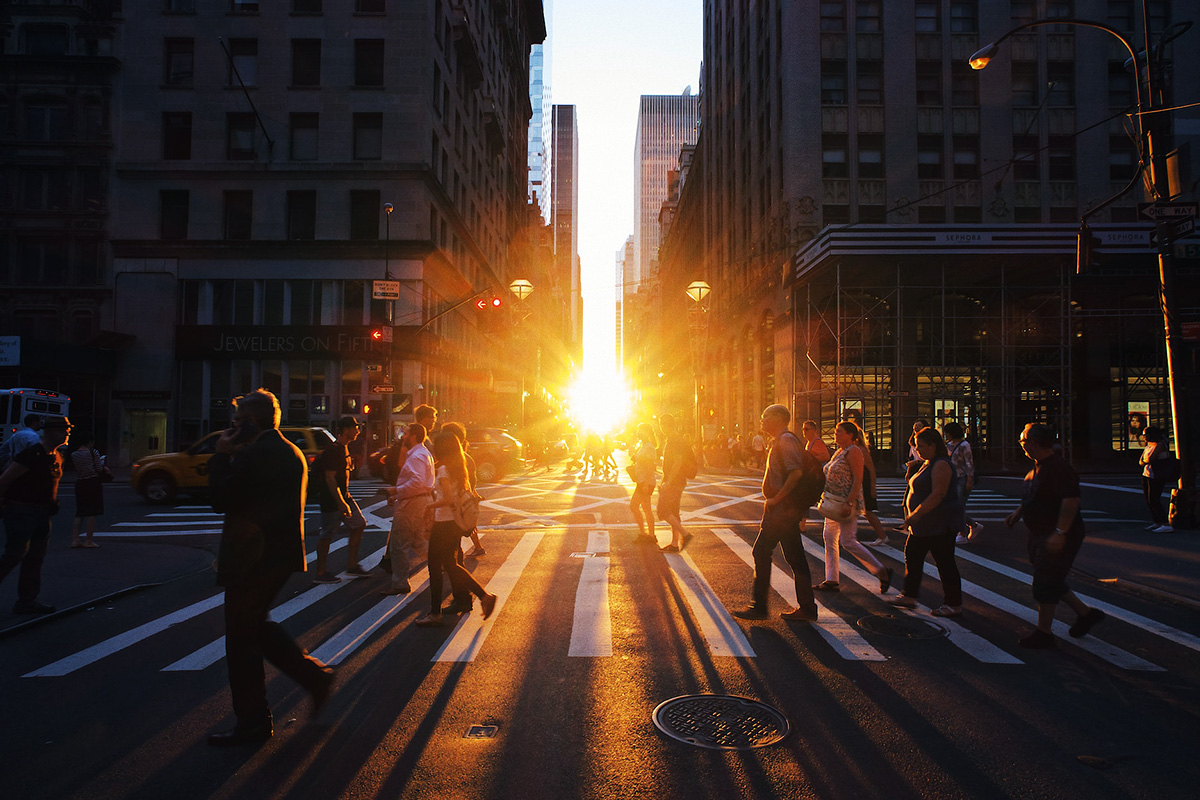
3. Build a stage from hard light
On a bright day, find a narrow area of light surrounded by shadow: the gap between buildings, a station exit or sunlight striking one wall. Expose for the bright area and wait for a person to enter.
The result can be almost theatrical, but timing matters. A clean silhouette or one well-separated figure is usually stronger than a cluster of overlapping bodies.
Starting point: Use –0.3 to –1 EV exposure compensation if the camera keeps lifting the shadows. Check the histogram so important highlights are not irretrievably clipped.
I enjoy golden and blue hour, but midday light should not be dismissed. It is harsher, more graphic and often better for shape.
4. Follow one colour through the city
Choose a colour before leaving—red is obvious, but pale green, yellow or a particular blue can be more interesting. Look for it in clothing, transport, signs and reflected light.
The goal is not to photograph isolated red objects. Wait until the colour appears in two or three places that hold the frame together.
Assignment: Create a set of five images using the same colour in different roles: subject, background, accent, reflection and absence.
5. Use reflections to combine two moments
Reflections are one of the street elements I notice most often. Shop windows, bus shelters, car glass, polished façades and puddles can place subjects that are physically separated into one frame.
The challenge is not finding a reflection; it is making the layers readable. Move slowly. A change of a few centimetres can place a reflected face against darkness, remove a lamp from someone’s forehead or align two scenes.
Assignment: Make one photograph in which the viewer can understand both the reflected world and the scene behind the glass.
Technical note: A polarising filter may weaken the reflection you need. Rotate it while looking through the viewfinder, or remove it.
6. Compose in three layers
Use foreground, middle distance and background as active parts of the picture. A close shoulder or window edge can create depth; the main action sits in the middle; architecture or a second gesture completes the rear plane.
This is easier with a moderately wide lens because I can stay close while preserving context. The risk is clutter.
Assignment: Before pressing the shutter, name what each of the three layers contributes. If one layer only distracts, simplify.
7. Find frames within the frame
Doors, windows, arches, railings, gaps between people and even the space beneath an umbrella can isolate a subject without using shallow depth of field.
I treat these structures as borders, not decorations. Every edge should help direct attention.
Assignment: Create three versions of the same scene: a complete frame around the subject, a partial frame and no frame. Compare which feels least forced.
8. Look for juxtaposition
Juxtaposition happens when two ordinary elements create a new meaning together: a person echoing an advertisement, formal clothing beneath a chaotic mural, or a tiny dog passing an enormous stone animal.
It can be humorous, critical or simply strange. The danger is reducing a person to a joke they never chose to make.
Assignment: Find a background that suggests a second meaning, then wait for a subject who completes it without being demeaned by it.
9. Break a pattern
Rows of windows, paving stones, umbrellas or commuters create order. One different colour, direction or gesture creates the event.
This works best when the pattern is allowed enough space. Do not crop so tightly that the interruption loses its system.
Assignment: Fill most of the frame with repetition and use one small difference as the subject.
10. Work with silhouettes
A silhouette removes facial detail and turns a person into shape and gesture. Photograph against a bright sky, illuminated window, sunset or station entrance.
Separation is essential. Wait until arms and legs are visible rather than merged into the body, and avoid overlapping multiple figures unless their combined shape is deliberate.
Starting point: Meter for the bright background, use around 1/500 second for walking figures and let the subject fall dark.
11. Photograph rain rather than waiting it out
Rain changes the street more thoroughly than many photographers realise. It changes colour, pace, posture, reflections and the way people share space beneath shelter.
Photograph through a wet window, use headlights on the road, or watch how umbrellas repeat. Protect the camera, but do not let the cover make controls impossible to reach.
Assignment: Make four images: a sharp subject in rain, deliberate motion blur, a reflection and a detail that shows the weather without showing a raindrop.
12. Watch windows and thresholds
A doorway or window divides public and private, movement and pause, inside and outside. It can also create a difficult ethical boundary.
I photograph what is offered to public view, but I do not use a long lens to peer into homes or private moments simply because glass makes them technically visible.
Assignment: Photograph five thresholds where the architecture—not an unaware private subject—creates the tension.
13. Study public transport
Stations and vehicles concentrate repeated gestures: waiting, reading, boarding, sleeping and watching the city pass. They also have rules that differ from ordinary streets.
Check whether photography is allowed, especially around security infrastructure, ticket barriers and privately operated systems. Avoid blocking doors or platforms.
Assignment: Build a sequence of arrival, waiting, movement and departure without relying on a single close face.
14. Photograph people at work
Work creates purposeful gestures and objects. Market vendors, repairers, cooks visible from the street, cleaners and delivery workers can show how a city functions beyond its landmarks.
The closer and longer I stay, the stronger the reason to introduce myself. A brief conversation often produces better access and a more accurate understanding of what I am seeing.
Assignment: Ask one person whether you can photograph them working. Explain where the image may appear, keep the session short and offer to send the finished frame.
15. Make quiet street photographs
Street photography does not need a dramatic coincidence in every frame. An empty chair after rain, worn steps, a closed kiosk or traces left after a crowd can speak about use and time.
These photographs are valuable inside a series because they give the sequence room to breathe.
Assignment: Walk early on a Sunday or after an event. Photograph evidence of people without including a person.
16. Follow urban animals
Pigeons, dogs, cats and other animals negotiate the city differently from us. They occupy ledges, shadows, doorways and human routines in ways that can be both visual and revealing.
Do not bait, chase or corner an animal for a photograph.
Starting point: Use continuous autofocus and at least 1/500 second; 1/1000 is safer for erratic movement. A short burst can help, but timing still matters more than filling the card.
17. Put street art back into the street
I have photographed graffiti and street art in places including Metelkova in Ljubljana and the former HOPE Outdoor Gallery in Austin. What interests me is not only the painted surface but what grows around it: scale, weather, architecture, passers-by and the difference between a wall made for art and one used without permission.
Assignment: Make three images of one work: an establishing view, a detail and a contextual frame containing a human relationship to the site.
Rights note: The photograph may be yours while the artwork remains someone else’s intellectual creation. Commercial reproduction can raise separate copyright questions, particularly when the mural is the sole subject.
18. Let text change the picture
Street signs, menus, advertisements and hand-written notices can introduce language into a visual scene. The words may explain, contradict or accidentally comment on a person nearby.
Do not settle for a funny sign alone. Wait for life to activate it.
Assignment: Find a line of text and make a frame in which removing the words would change the meaning completely.
19. Change your height
Most street photographs are made from standing eye level because that is where the camera happens to be. Kneeling near a pattern, looking from public stairs or shooting from an elevated walkway changes the relationships between people and ground.
Unusual angles are useful when they reveal structure. An angle that exists only to look unusual becomes a gimmick quickly.
Safety: Never step into a cycle lane, road or platform edge while looking through the viewfinder. A clean composition is not worth surrendering spatial awareness.
20. Make movement visible
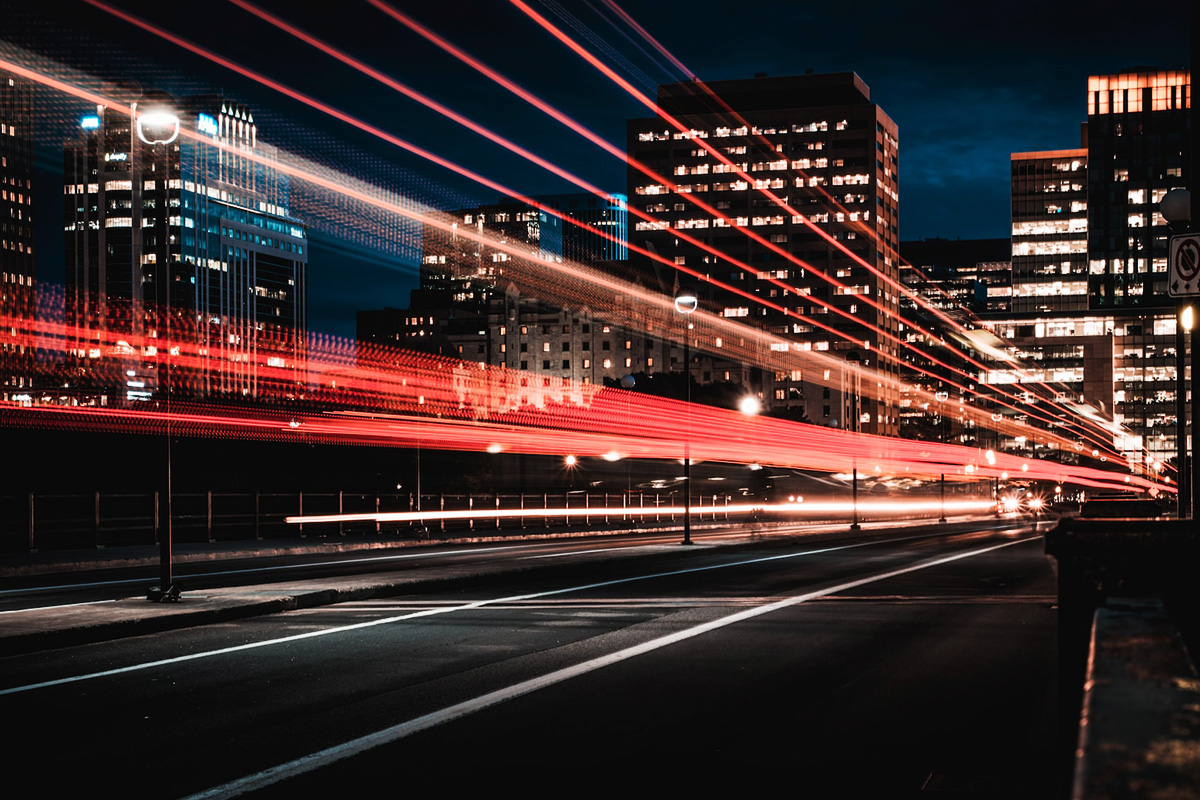
Not every moving subject needs to be frozen. Slow shutter speeds can turn commuters into traces, keep a panned cyclist sharp against a flowing background or transform traffic into light.
As a starting point:
- 1/30–1/60 sec: panning with a cyclist or car;
- 1/8–1/15 sec: walking figures becoming recognisable blur;
- 1–10 sec: traffic trails from a stable support at night.
Canon’s current motion-photography guide similarly treats shutter speed as the main creative control and suggests roughly 1/250 second for freezing pedestrians, with faster speeds as movement increases.
Assignment: From one safe position, make a sharp frame, a panned frame and a fully blurred frame of the same flow of movement.
21. Work at night
At night, the city stops being evenly lit and becomes a collection of small stages. Shop windows, bus shelters, signs and car lights separate subjects from darkness.
I accept more ISO noise before accepting accidental subject blur. A technically clean file with no gesture is not more useful than a grainy file that holds the moment.
Starting point: Try aperture priority or manual exposure with Auto ISO, the lens reasonably open, and a minimum shutter speed around 1/125 second for relatively still subjects or 1/250 second for walking. Watch bright signs; they clip early.
22. Ask a stranger for a portrait
Candid photography and street portraiture are different approaches, and both belong in a broad street practice. I enjoy talking to people I meet; permission changes the encounter rather than destroying it.
Keep the request direct:
Hi, I’m working on a photography project about this neighbourhood. I noticed the light here and wondered if I could make a quick portrait of you. It will take less than a minute.
If the answer is no, thank the person and leave. Do not negotiate.
Assignment: Ask three people. The goal is not three yeses; it is three respectful interactions. If someone agrees, make a wide environmental frame and one closer portrait, then show the result if appropriate.
23. Use one focal length for a month
A zoom lens is useful, but changing focal length can hide indecision. Choose 28mm, 35mm, 50mm or another field of view and keep it fixed for several walks.
The exercise teaches distance. After enough repetition, I begin to recognise the frame before raising the camera.
Assignment: Use one focal length for four outings. Do not crop heavily to imitate another lens later.
24. Repeat the same route
Style grows from repeated decisions, and a project grows from repeated attention. Walk the same route at different hours, in rain, in winter and during local events.
The first outing gives facts. The later ones reveal change.
Assignment: Select five fixed points along a route and photograph them once a month. Add spontaneous frames between them. After six months, look for relationships you could not see on day one.
25. Tell a story in five frames
A single photograph has to contain its own logic. A sequence can distribute information.
Use this simple structure:
- Opening: Where are we?
- Character: Who or what carries the story?
- Detail: What would a wide view miss?
- Transition: How does the place move or change?
- Ending: Which frame leaves a question, consequence or sense of departure?
Assignment: Photograph a market, station, street festival or ordinary morning. Choose exactly five images. Reorder them until removing any one creates a clear gap.
Which lens is best for street photography?
There is no mandatory street lens. Focal length changes both composition and behaviour: how close I stand, how much context I include and how visible the act of photographing becomes.
| Full-frame equivalent | What it does well | Main risk |
|---|---|---|
| 24–28mm | Layers, close energy, architecture and tight spaces | Empty edges, distortion and accidental clutter |
| 35mm | Balanced context and subject; a classic walk-around view | Can feel ordinary without strong timing |
| 50mm | Cleaner frames and natural separation | Requires more distance; less context in tight streets |
| 85–135mm | Details, compressed layers, light across a distance | Detached surveillance feeling; flattened space |
| Standard zoom | Flexible when the route or assignment is unknown | Zooming can replace moving and committing |
I do not use a longer lens simply to avoid every interaction. Distance can be a visual choice, but it should not become a way to take intimate pictures that I would be uncomfortable making openly.
For a first dedicated outing, a small 35mm-equivalent prime or compact standard zoom is enough. The camera I am willing to carry for two hours is more useful than the technically superior one left at home.
Reliable street photography settings
These are starting points, not universal presets. Light, sensor size, stabilisation, subject speed and personal tolerance for blur all matter.
| Situation | Shutter speed | Aperture | ISO/focus starting point |
|---|---|---|---|
| Walking pedestrians, daylight | 1/250–1/500 sec | f/5.6–f/8 | Auto ISO; AF-C or zone focus |
| Fast cyclists or running | 1/1000 sec or faster | f/4–f/8 | Auto ISO; AF-C tracking |
| Layered daylight scene | 1/250 sec minimum | f/8 | Auto ISO; single point or prefocus |
| Asked portrait | 1/250 sec | f/2–f/4 | Eye AF or single-point AF |
| Night street | 1/125–1/250 sec | As open as useful | Auto ISO up to a level you accept |
| Panning | 1/30–1/60 sec | Let ISO/aperture follow | AF-C; move smoothly with subject |
| Walking blur | 1/8–1/15 sec | f/8–f/16 in brighter light | Low ISO; brace camera |
| Light trails | 1–10 sec or longer | f/8–f/16 | Low ISO; stable support or tripod |
Aperture priority with a minimum shutter speed
This is my most practical general setup when light changes constantly. I choose the depth of field, set Auto ISO and tell the camera not to fall below a useful shutter speed. Check that your camera actually allows a configurable minimum; models handle Auto ISO differently.
Manual exposure with Auto ISO
This is useful when I want both shutter speed and aperture fixed. The camera adjusts ISO as light changes. Exposure compensation may or may not work in this mode depending on the camera.
Shutter priority for movement
Use it when motion is the idea: 1/500 second to freeze, 1/30 second to pan, or 1/8 second to blur. Auto ISO can keep the aperture from drifting beyond the available range.
Protect highlights, but not blindly
Digital highlights can disappear abruptly around signs, windows and reflected sun. A small amount of negative exposure compensation is often useful in hard light. At night, however, exposing only for the brightest sign can leave every human subject unusably dark. Decide what the photograph is about.
Autofocus or zone focus?
Modern autofocus is fast and often the sensible choice. Use AF-C for subjects moving toward or across the frame, and a single point or small zone when the background contains many competing edges.
Zone focusing is different: I focus manually at a chosen distance and use depth of field so that a range in front of and behind that point appears acceptably sharp. It is useful in predictable daylight situations and with wider lenses.
A Fujifilm street-photography guide gives a practical example: with a 23mm lens at f/8 focused around 10 feet, a broad working area can remain acceptably sharp. The exact near and far limits depend on sensor size, focal length, aperture, focus distance and the standard used to judge sharpness, so check the scale or calculator for your own equipment. The broader principle is more important than memorising one set of numbers.
Zone focus is not automatically faster if I keep forgetting the active distance. Autofocus is not automatically better if it locks onto the advertisement behind the subject. Use the method that removes uncertainty from the scene in front of you.
Street photography with a phone
A phone is not a lesser camera for this work. It is quiet, always available and well suited to wide environmental frames. It also has limitations: small sensors become noisy at night, computational processing can make movement look strange, and digital zoom quickly reduces quality.
My phone workflow would be simple:
- clean the lens before leaving;
- use the main camera rather than digital zoom;
- tap and hold to lock focus/exposure when the scene repeats;
- reduce exposure slightly in hard light to protect highlights;
- use burst or a short Live/Motion Photo sequence for one fast gesture;
- keep the phone at a deliberate height instead of always photographing from chest level;
- switch off artificial shutter sounds only where the device and local rules allow it;
- do not stare at the screen while stepping into traffic.
The same visual assignments apply. A phone cannot replace patience, and an expensive camera cannot supply it.
Photographing strangers: candid, permission and responsibility
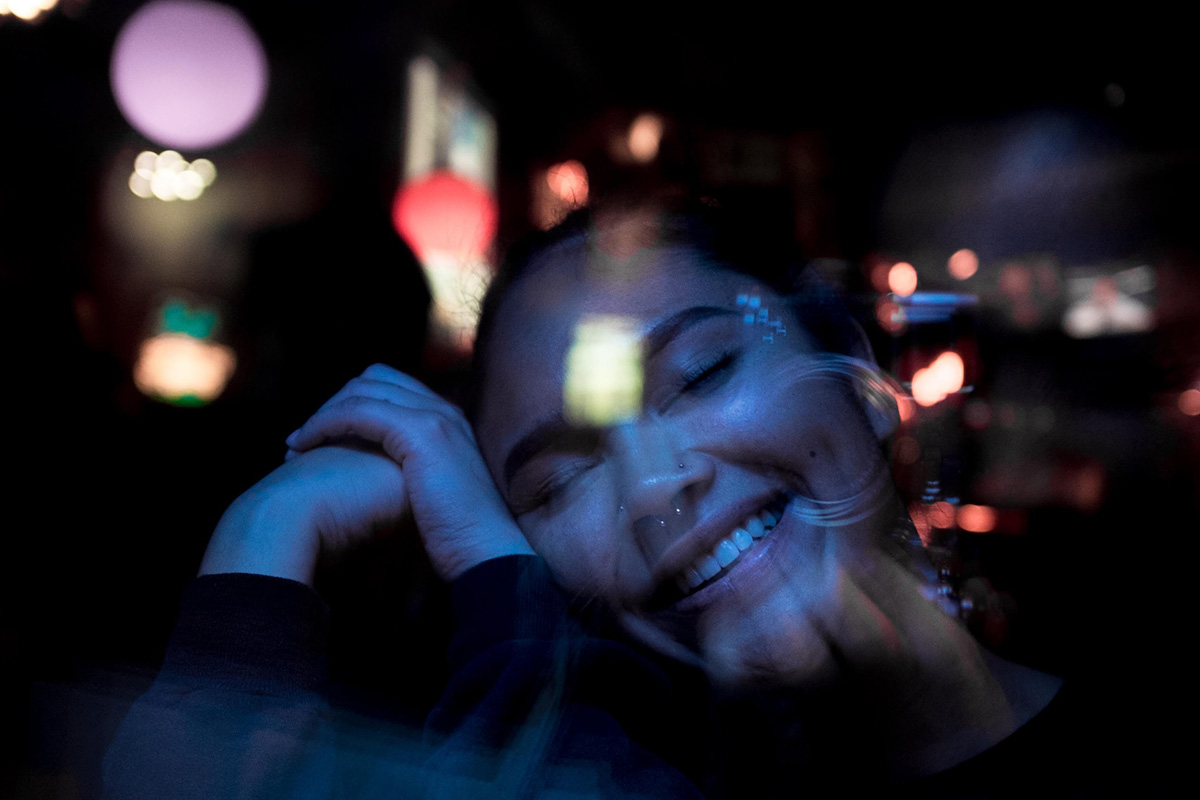
The old version of this guide suggested always obtaining permission before photographing people. That is a respectful default for an asked portrait, but it is not a complete description of street photography or law.
If permission is requested before a candid moment, the moment changes. Sometimes that change is the point. At other times, the photograph depends on an unrepeatable public gesture. The better question is not only “Did I ask?” but also:
- Was the person in a place where privacy could reasonably be expected?
- Is the moment intimate, vulnerable or potentially humiliating?
- Am I documenting public life or using someone as a visual joke?
- Would publication expose identity, location, health, poverty or distress?
- Is the subject a child or otherwise less able to understand or object?
- Is the photograph editorial/artistic, or will it advertise a product?
- What would I do if the person asked me not to publish it?
If someone notices me
I do not pretend the camera was pointed elsewhere. A calm nod is often enough. If they ask what I am doing, I explain truthfully. I can show the frame without handing over an unlocked camera or phone.
If someone asks for deletion, the law may not always require it, but the human cost of keeping one ordinary frame is often greater than its photographic value. I would rather lose a picture than win an unnecessary confrontation.
Children and vulnerable situations
I use a much higher threshold for photographing and especially publishing identifiable children, people in medical distress, victims, unhoused people or anyone in a moment of humiliation. The NPPA Code of Ethics asks visual journalists to treat subjects with dignity and give special consideration to vulnerable people and victims. A personal art project should not need a lower standard simply because it is not news.
Photographing hardship does not automatically create social insight. Ask what the image explains, who benefits from its publication and whether the person has been given any agency.
Is street photography legal?
There is no worldwide answer. Rules change by country and may differ between making a photograph, storing it, publishing it, selling a print and using it commercially. Public access does not turn every railway station, shopping centre, café or event into unrestricted public property. Privacy, data protection, personality rights, copyright, security rules and terms of entry can all matter.
In Slovenia, the Information Commissioner published a detailed opinion recognising street photography as a potentially important documentary and artistic form protected by freedom of expression, while also stressing that identifiable people retain personality and privacy rights. That street-photography opinion was issued under the former ZVOP-1 framework, so it should be read as context, not as a current universal permission slip. Newer opinions under ZVOP-2 and the GDPR also show that publication and identifiable subjects require case-by-case analysis, with children receiving particular protection.
My practical approach is:
- check the law and current official guidance where I am photographing;
- obey clear restrictions on private property;
- distinguish personal/artistic publication from advertising or endorsement;
- obtain a release when an identifiable person is central to commercial use;
- avoid publishing sensitive or misleading context;
- ask a qualified local lawyer when a project carries real legal or commercial risk.
This section is a working checklist, not legal advice.
Safety on the street
Attention narrows through a viewfinder. That is useful for composition and dangerous near traffic.
- Stop fully before framing near a road, track, cycle lane or platform.
- Do not walk backward into a crossing to keep a subject in frame.
- Use a simple strap and keep the bag closed.
- Avoid displaying all equipment at once.
- At night, work with someone when the area or route is unfamiliar.
- Do not climb barriers, fire escapes, roofs or construction structures for an angle.
- Respect police, emergency and security perimeters.
- Leave a tense situation early; no frame needs to be defended physically.
- Check the weather and keep one dry cloth separate from wet camera gear.
- Let someone know the route if working alone late.
Situational awareness is part of technique. A photographer who sees only the frame is not fully seeing the street.
How I edit and select street photographs
Street photography improves during selection as much as during capture. The near-miss often feels valuable because I remember the effort. The viewer only sees the result.
First pass: remove technical failures
I reject accidental blur, missed focus and unusable exposure unless the flaw contributes something irreplaceable. Deliberate blur is not the same as a camera moving at the wrong moment.
Second pass: compare gestures
When several frames share the same background, I compare hands, feet, separation and eye direction. One small difference can turn a group of overlapping figures into a readable relationship.
Third pass: check the edges
I look for half people, bright objects and lines touching the border. Cropping can help, but a crop that removes too much context may reveal that the frame was never organised.
Fourth pass: ask what remains without the memory
If the photograph only works after I explain how difficult it was to make, it probably does not work yet. The image needs to carry enough evidence of its own.
Keep documentary edits honest
I adjust exposure, white balance, contrast, colour and crop. I may dodge or burn with restraint. If a photograph is presented as a document of a real public moment, I do not use generative tools to add, remove or replace people or objects. The NPPA’s visual-integrity standards are written for journalism, but the principle is useful here: factual credibility depends on the recorded scene remaining intact.
For a practical editing workflow, see how I edit photos in GIMP. Before publishing images from a phone or camera on my own site, I also check metadata and file size; the browser-based Image Compressor is designed to remove EXIF metadata while compressing locally.
From single photographs to a recognisable style
Style is not a preset. It is the pattern formed by repeated choices: distance, subject, light, colour, timing, ethics and what I leave out.
Study photographers for decisions, not imitation
The earlier article named Henri Cartier-Bresson, Vivian Maier and Garry Winogrand. Their work remains useful, but the lesson is not to copy black-and-white contrast or camera angle. Ask more specific questions:
- How close is the photographer?
- What information is allowed at the edge?
- Does the frame describe a place or isolate an event?
- Is humour directed upward, sideways or at someone with less power?
- What happens before and after the selected moment?
- How do several photographs work together?
MoMA’s street-photography collection and the Metropolitan Museum’s essays on the new documentary tradition are better starting points than copying isolated images from social feeds without context.
Build contact sheets
A grid of small images reveals repetition quickly. I can see that I always stand too far away, centre every subject, rely on the same colour contrast or keep five versions when one would do.
Make one contact sheet per outing, then a second containing only the selected frames from a month. The second sheet begins to show a point of view.
Sequence before publishing
Do not order a series only by capture time. Begin with a frame that establishes tone, vary distance and density, avoid placing two near-identical compositions together, and end with an image that changes or releases the rhythm.
A strong sequence can include a quiet frame that would not win attention alone. Its job is relational.
A seven-day street photography challenge
| Day | Constraint | Deliverable |
|---|---|---|
| 1 | One corner, 45 minutes | Three different moments on one background |
| 2 | No faces | Five frames built from gesture, objects or traces |
| 3 | One colour | A four-image colour sequence |
| 4 | One focal length | Ten candidates, edited to two |
| 5 | Movement | One sharp, one panned and one blurred frame |
| 6 | One conversation | One asked portrait with a short written note |
| 7 | Return and sequence | A final five-frame story from the week |
Do not publish each day automatically. The exercise is complete when the edit is complete, not when the card is full.
Common street photography mistakes
Walking all day without staying anywhere
Constant movement produces many backgrounds and few resolved scenes. Stop when the light, structure or human rhythm is promising.
Using shallow depth of field for every frame
A blurred background can rescue clutter, but it can also remove the social and architectural context that makes street photography distinct. Try f/5.6 or f/8 when the layers matter.
Photographing only from behind
Backs are easy and anonymous. They can be effective, but an entire portfolio of people walking away often reflects hesitation more than intent.
Confusing proximity with courage
Getting close does not automatically produce honesty. Distance can be thoughtful; proximity can be aggressive. Choose according to the picture and the person, not a rule from social media.
Turning people into props
A person is not merely the red object required to complete a colour composition. The picture may be about form, but publication still affects a real subject.
Keeping every coincidence
A visual rhyme is not enough if the frame is confused. Ask whether the relationship is legible without a caption explaining it.
Editing before selecting
Spending ten minutes on every frame makes weak photographs harder to reject. Select first, then edit the smaller group.
Frequently asked questions
What should a beginner photograph on the street?
Begin with a fixed background rather than chasing strangers. Choose one corner, doorway, reflection or strip of light and wait for a subject to complete it. This gives you time to manage composition and settings.
Does street photography need people?
No. People can be absent while their presence remains visible through objects, signs, wear, architecture and traces. A coherent photograph of public life can be made without an identifiable face.
Do I need permission to photograph strangers?
It depends on local law, the location, intended use and circumstances. Asked portraits require clear permission; candid artistic or documentary photography may be treated differently. Ethics can still argue against making or publishing an image even when the law allows it. Check current local guidance.
What is the best camera mode for street photography?
Aperture priority with Auto ISO and a safe minimum shutter speed is flexible. Manual exposure with Auto ISO works well when shutter speed and aperture must stay fixed. Shutter priority is best when motion itself is the main decision.
What shutter speed should I use?
Start around 1/250 second for walking pedestrians, 1/500 second for faster movement and 1/1000 second or more for running or cycling. For deliberate blur, try 1/8 to 1/60 second depending on speed and effect.
Is 35mm or 50mm better?
Neither is universally better. A 35mm-equivalent lens includes more environment and rewards working closer. A 50mm simplifies the frame and gives more distance. Use one for several walks before deciding.
What aperture is best?
Use f/5.6–f/8 for layered daylight scenes and zone focusing. Use f/2–f/4 when light is low or when a portrait needs separation. Aperture is a depth-of-field choice, not a badge of seriousness.
Can I use a phone for street photography?
Yes. Use the main camera, avoid digital zoom, lock exposure when waiting for a repeated scene and protect highlights. The phone’s availability and quiet operation are genuine advantages.
How do I overcome fear of photographing in public?
Begin with architecture, shadows and people at a distance. Make asked portraits so the interaction is explicit. Work with a friend, use one small camera and repeat familiar routes. Confidence should grow alongside respect, not replace it.
Is shooting from the hip a good technique?
It can be useful in tight situations or for a lower viewpoint, especially with a tilting screen. It also produces careless framing when used as a permanent way to avoid being seen. Use it deliberately, not automatically.
Should street photography be black and white?
Only when colour does not contribute or when tonal relationships carry the picture better. Black and white cannot turn weak timing into meaning, and colour is not less serious. Decide at the series level when possible.
How many photos should I take on a street walk?
There is no useful target. An assignment with 30 considered frames can teach more than 1,000 reactive ones. Judge the outing by the edit and what you learned, not by shutter count.
How do I create my own street photography style?
Repeat projects long enough for patterns to emerge. Study contact sheets, notice your preferred distance and subjects, sequence small series and seek feedback on the work as a group—not only on isolated popular images.
Final thoughts
The city does not run out of photographs. I run out of ways to look at it.
That is why assignments matter. One colour changes what I notice. One corner teaches me to anticipate. One conversation turns an unknown face into a person with a voice. A repeated route reveals that the ordinary street I thought I knew was changing all along.
I still value the fleeting frame—the gesture, reflection or alignment that exists for less than a second. But those moments are not found by moving faster. They are found by becoming ready, staying curious and knowing when the photograph matters less than the person inside it.